Introduction
Managing local admin rights across a modern workplace is a delicate balance between empowering users and maintaining security. With the introduction of Endpoint Privilege Management (EPM) in the Microsoft Intune Suite, organizations can now grant Just-In-Time (JIT) and/or rule-based elevation for standard users—without compromising control or compliance.
However, when elevation requests require approval, IT teams need a fast and reliable way to respond.
In this post, we’ll walk through how to integrate EPM with Microsoft Teams using Azure Logic Apps. The goal? Automatically notify IT or security teams when a user requests elevation, streamlining the approval process and improving visibility. Whether you’re managing a large enterprise or a hybrid workforce, this solution helps reduce friction while keeping your endpoints secure.
What is Endpoint Privilege Management?
Endpoint Privilege Management (EPM) is a feature in the Microsoft Intune Suite that allows organizations to manage and control local administrator rights on Windows devices—without granting permanent admin access. It enables rule-based and Just-In-Time (JIT) elevation, ensuring users can perform privileged tasks only when necessary, and only under defined conditions.
Rules-Based Elevation: Three Options
EPM supports three types of elevation rules:
- Automatic Elevation
The application is elevated silently without user interaction, based on predefined rules. - User-Confirmed Elevation
The user is prompted to confirm the elevation request, typically with a business justification and/or Windows authentication. - Support-Approved Elevation
The user submits a request that must be approved by IT or support staff before elevation is granted. This is the model we’ll focus on in this post, as it allows integration with Microsoft Teams for real-time notifications and approvals.
Just-In-Time Elevation with Support Approval
Support-approved elevation is ideal for organizations that want to maintain strict control over admin rights while still enabling flexibility for end users. Essentially, when you are requesting elevation, the request is logged and routed for approval. Furthermore, by integrating this process with Microsoft Teams using Azure Logic Apps, IT teams can receive instant notifications and respond quickly—without switching tools or missing critical requests.
Currently, when approved, these requests remain valid for 24 hours. However, this is something I would like to tackle in another blog post somewhere down the road.
Benefits of Using EPM
Implementing Endpoint Privilege Management offers several key advantages:
- User Empowerment: Allows users to perform necessary tasks without waiting for manual intervention—when policies allow it.
- Improved Security: Reduces the attack surface by eliminating standing admin rights.
- Operational Efficiency: Automates elevation workflows and reduces helpdesk overhead.
- Compliance and Auditing: Provides detailed logs of elevation activity for auditing and compliance reporting.
Scenario Overview
It’s essential that IT or security teams are notified as soon as a user submits a request. This ensures timely responses and keeps the approval workflow efficient.
To achieve this, we use Azure Logic Apps to automate the process of sending a message to a Microsoft Teams channel the moment a request is made. The Logic App listens for elevation request events and posts a structured message (containing details like the user, device, application, and justification) directly into a designated Teams channel.
To monitor these requests, we leverage the Microsoft Graph API, which allows us to query and react to EPM-related events. This integration ensures that the notification is both real-time and secure, and it can be extended to include approval workflows or logging mechanisms if needed.
This setup bridges the gap between endpoint security and operational responsiveness, giving IT teams the visibility they need without manual overhead.
Step-by-Step Guide
Configure EPM
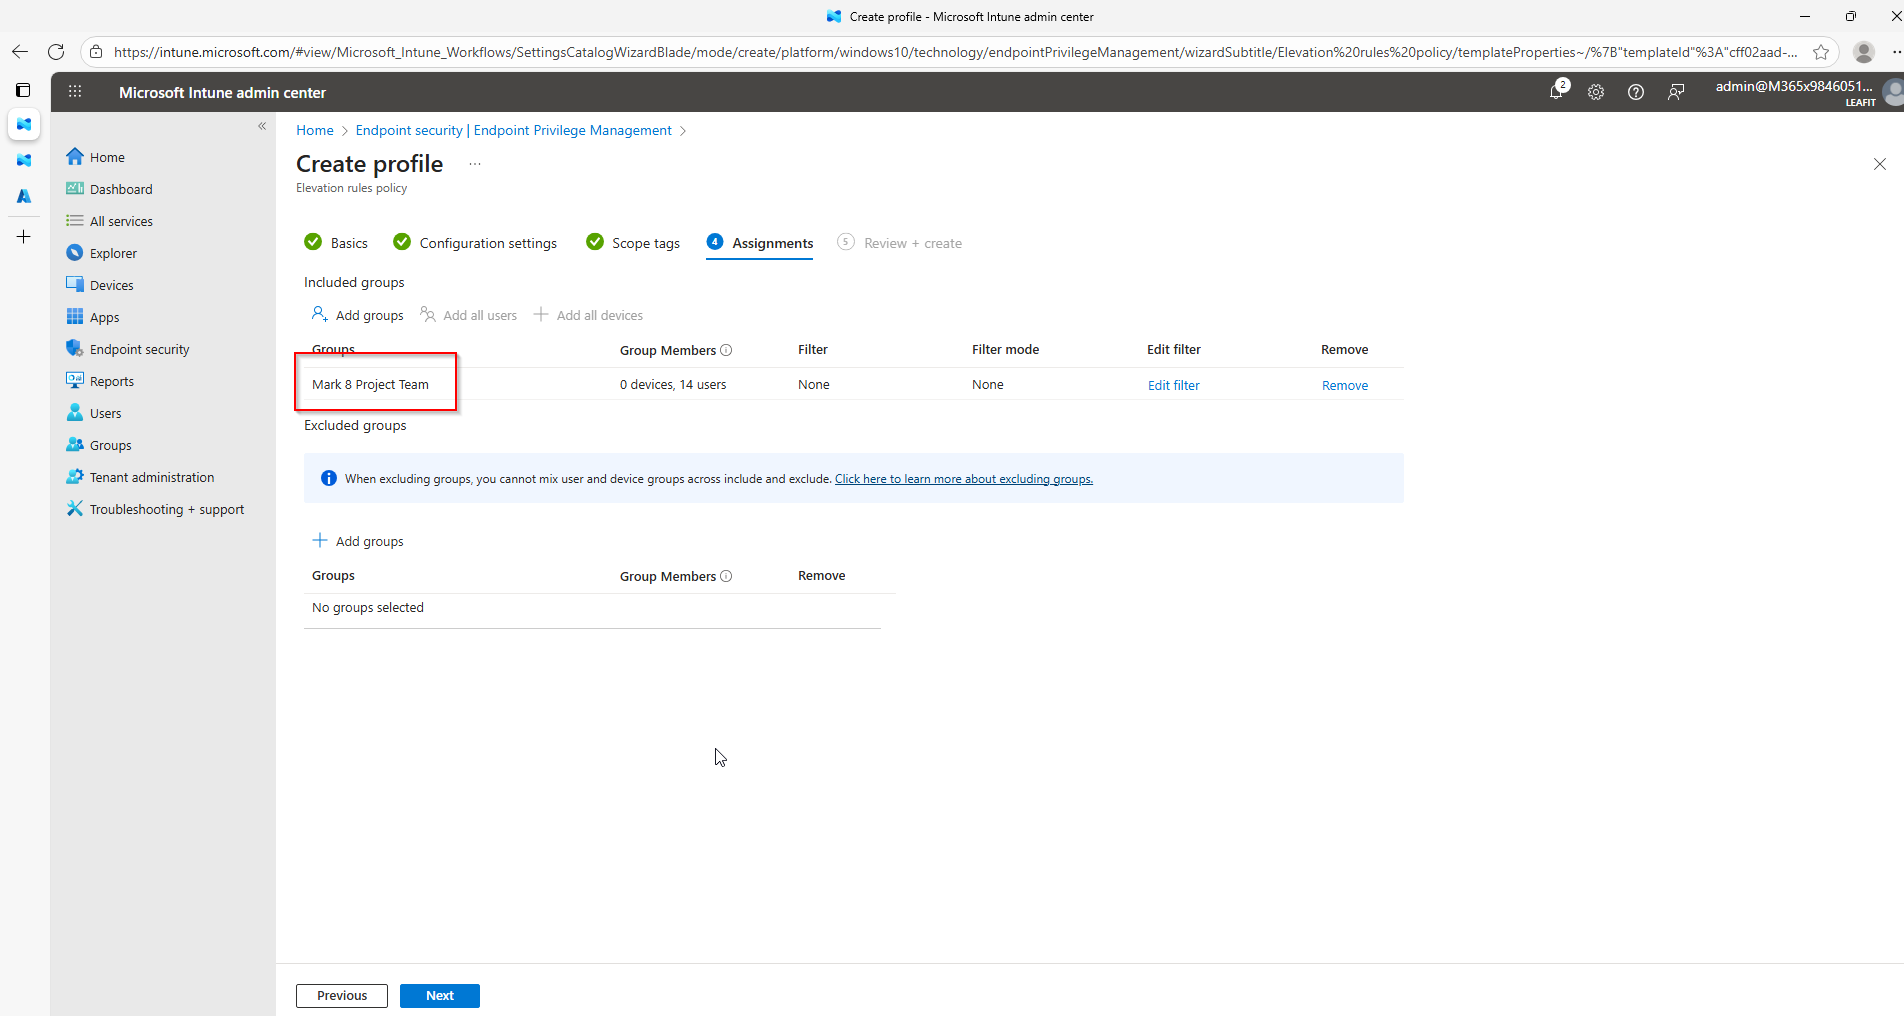
In my demo environment I want to enable all the people for the “Mark 8 Project Team” to be able to open Wireshark as an elevated user. For this I will create a “Elevation Rules Policy”, I am assuming here that EPM was already configured beforehand.
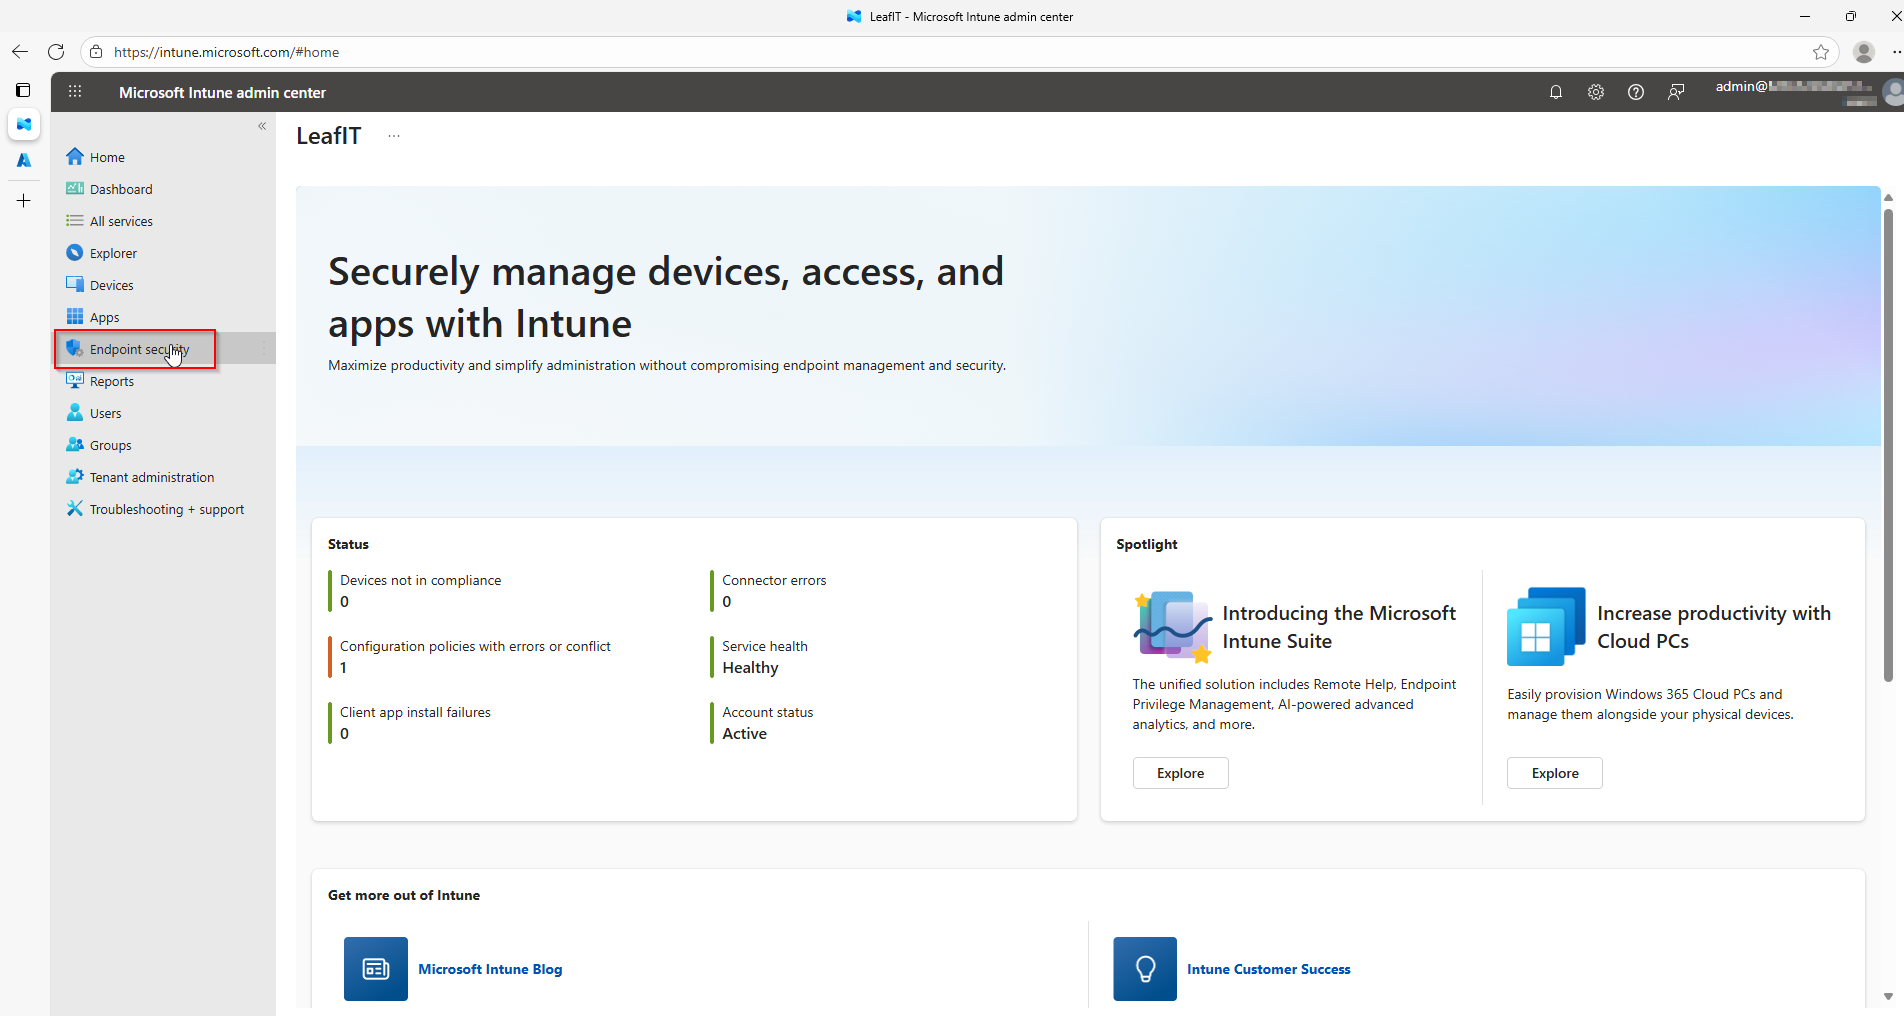
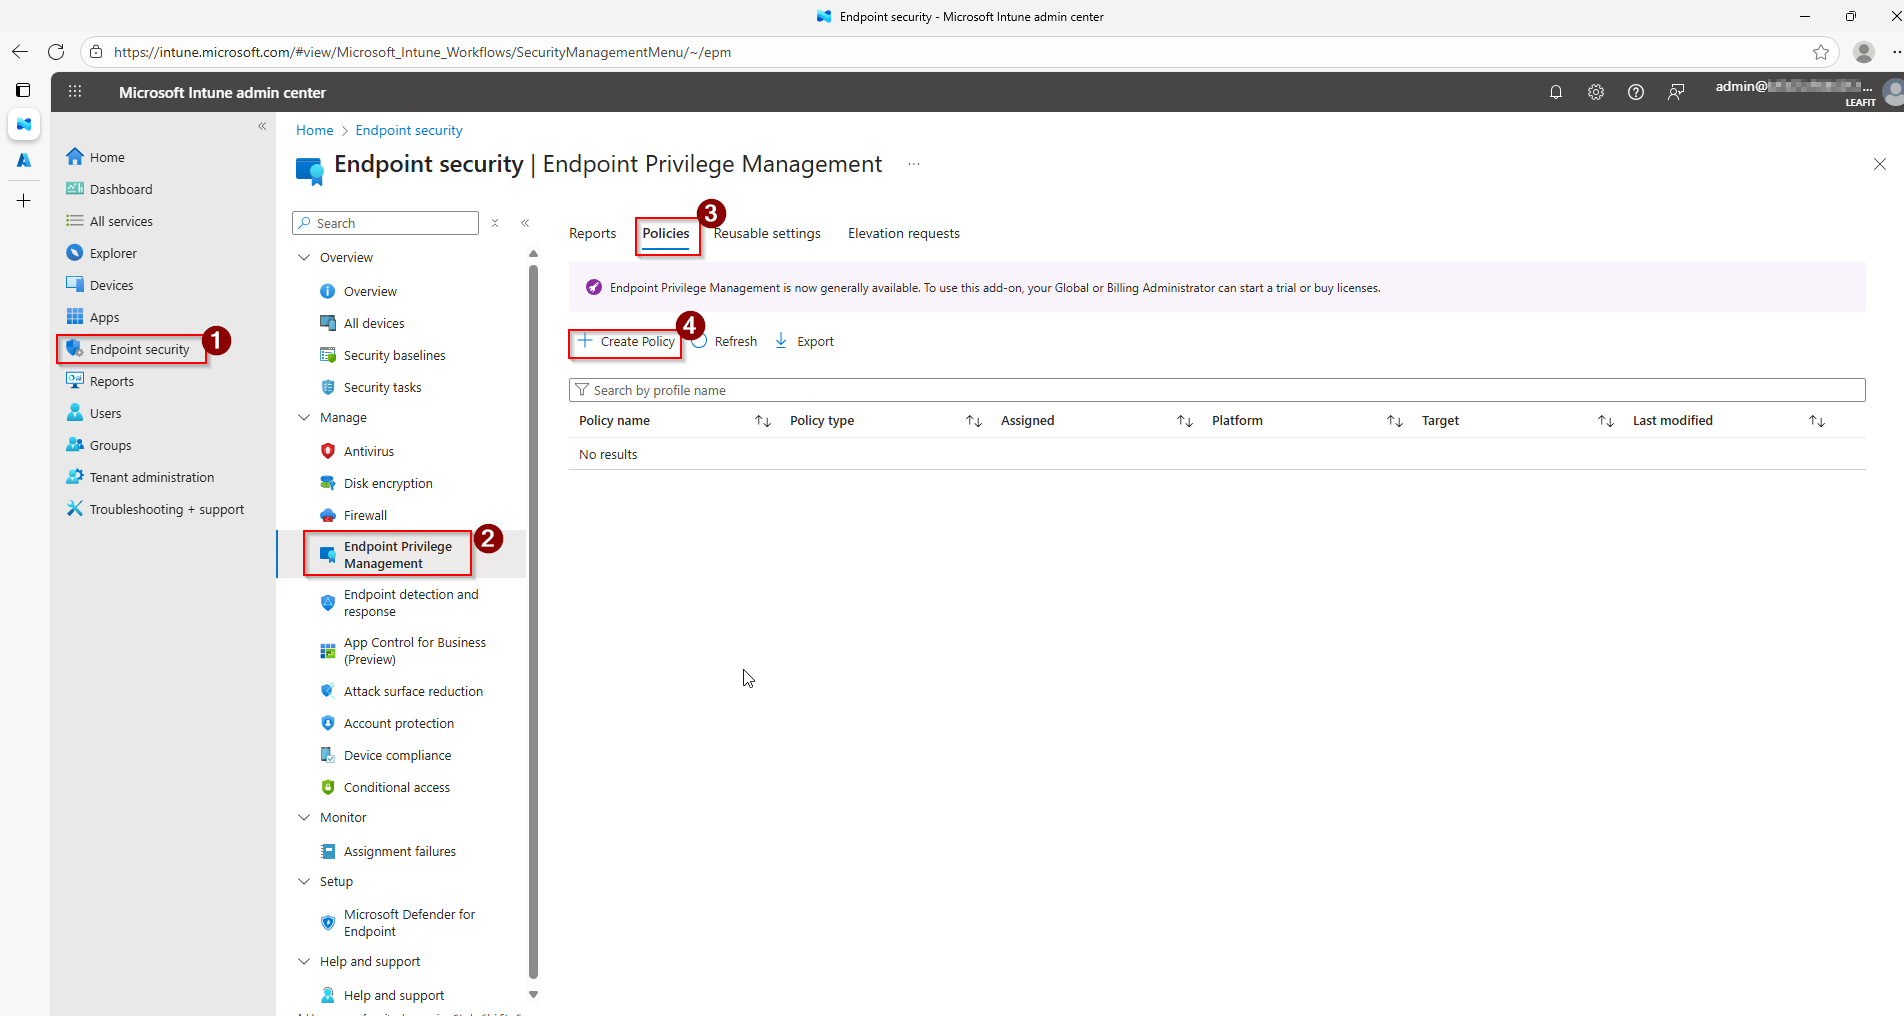
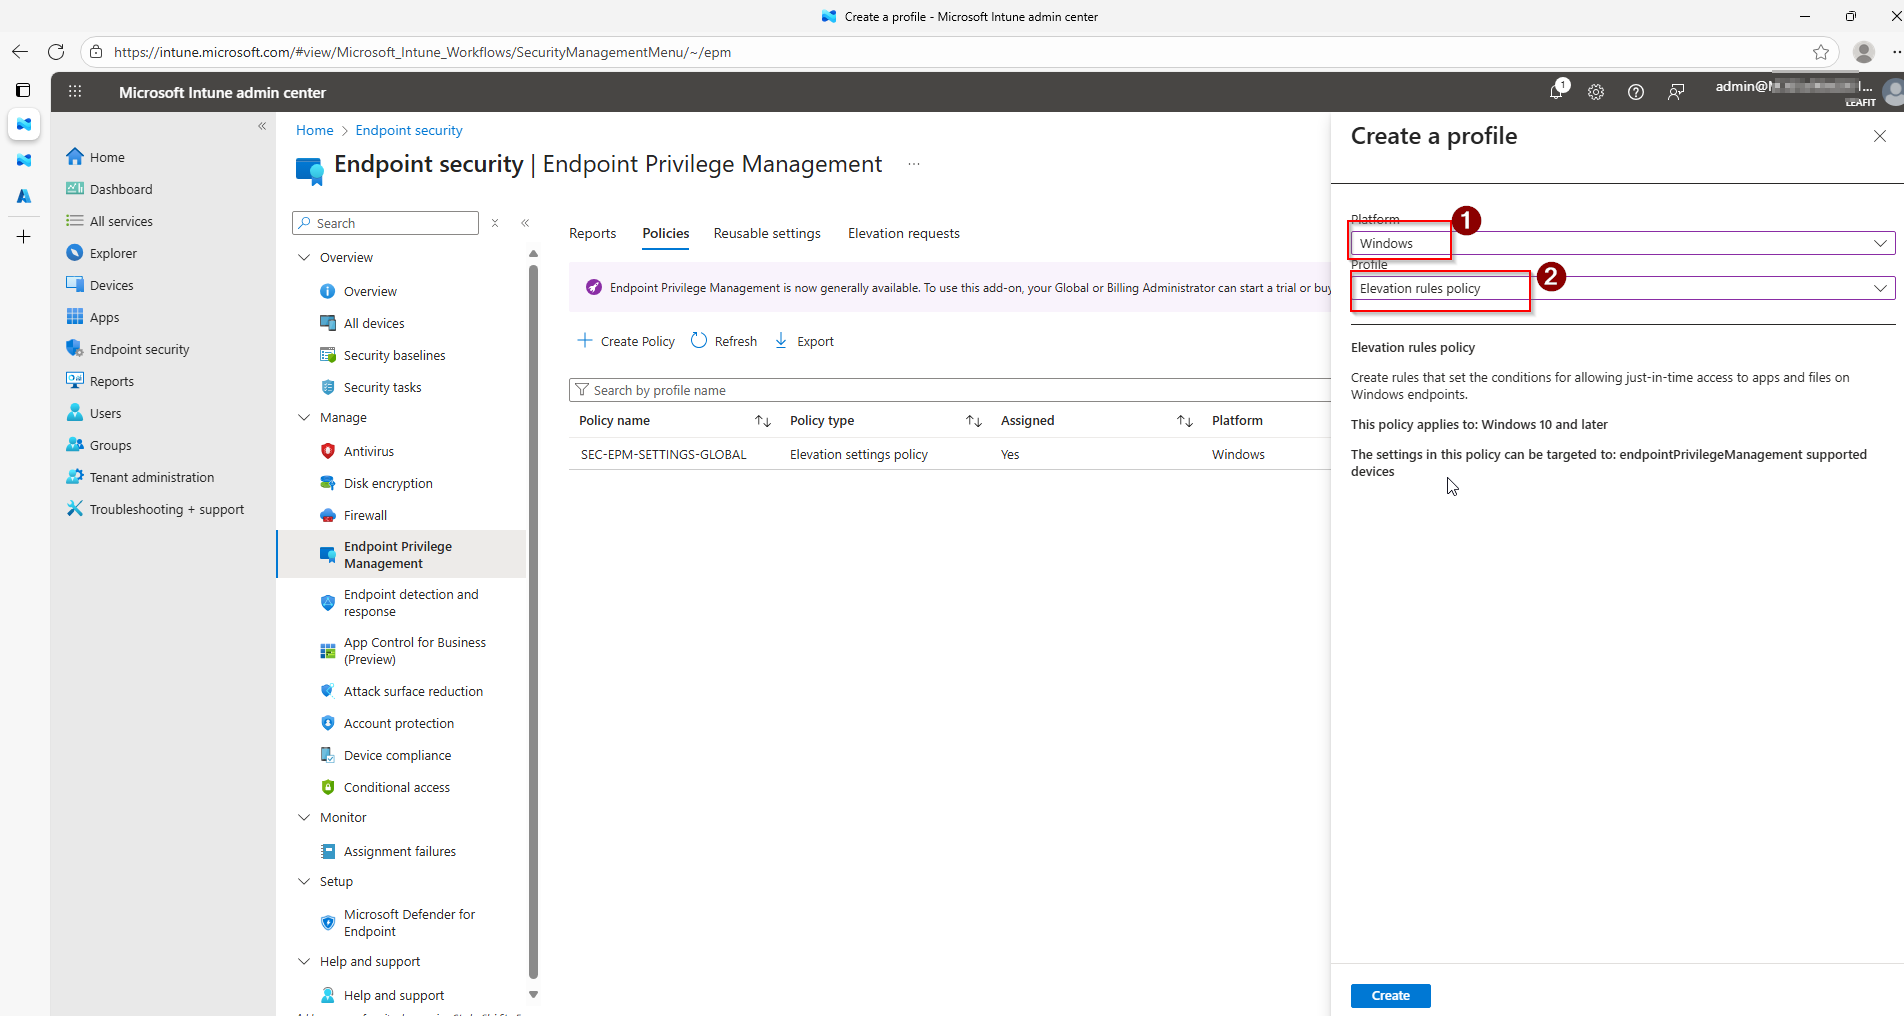
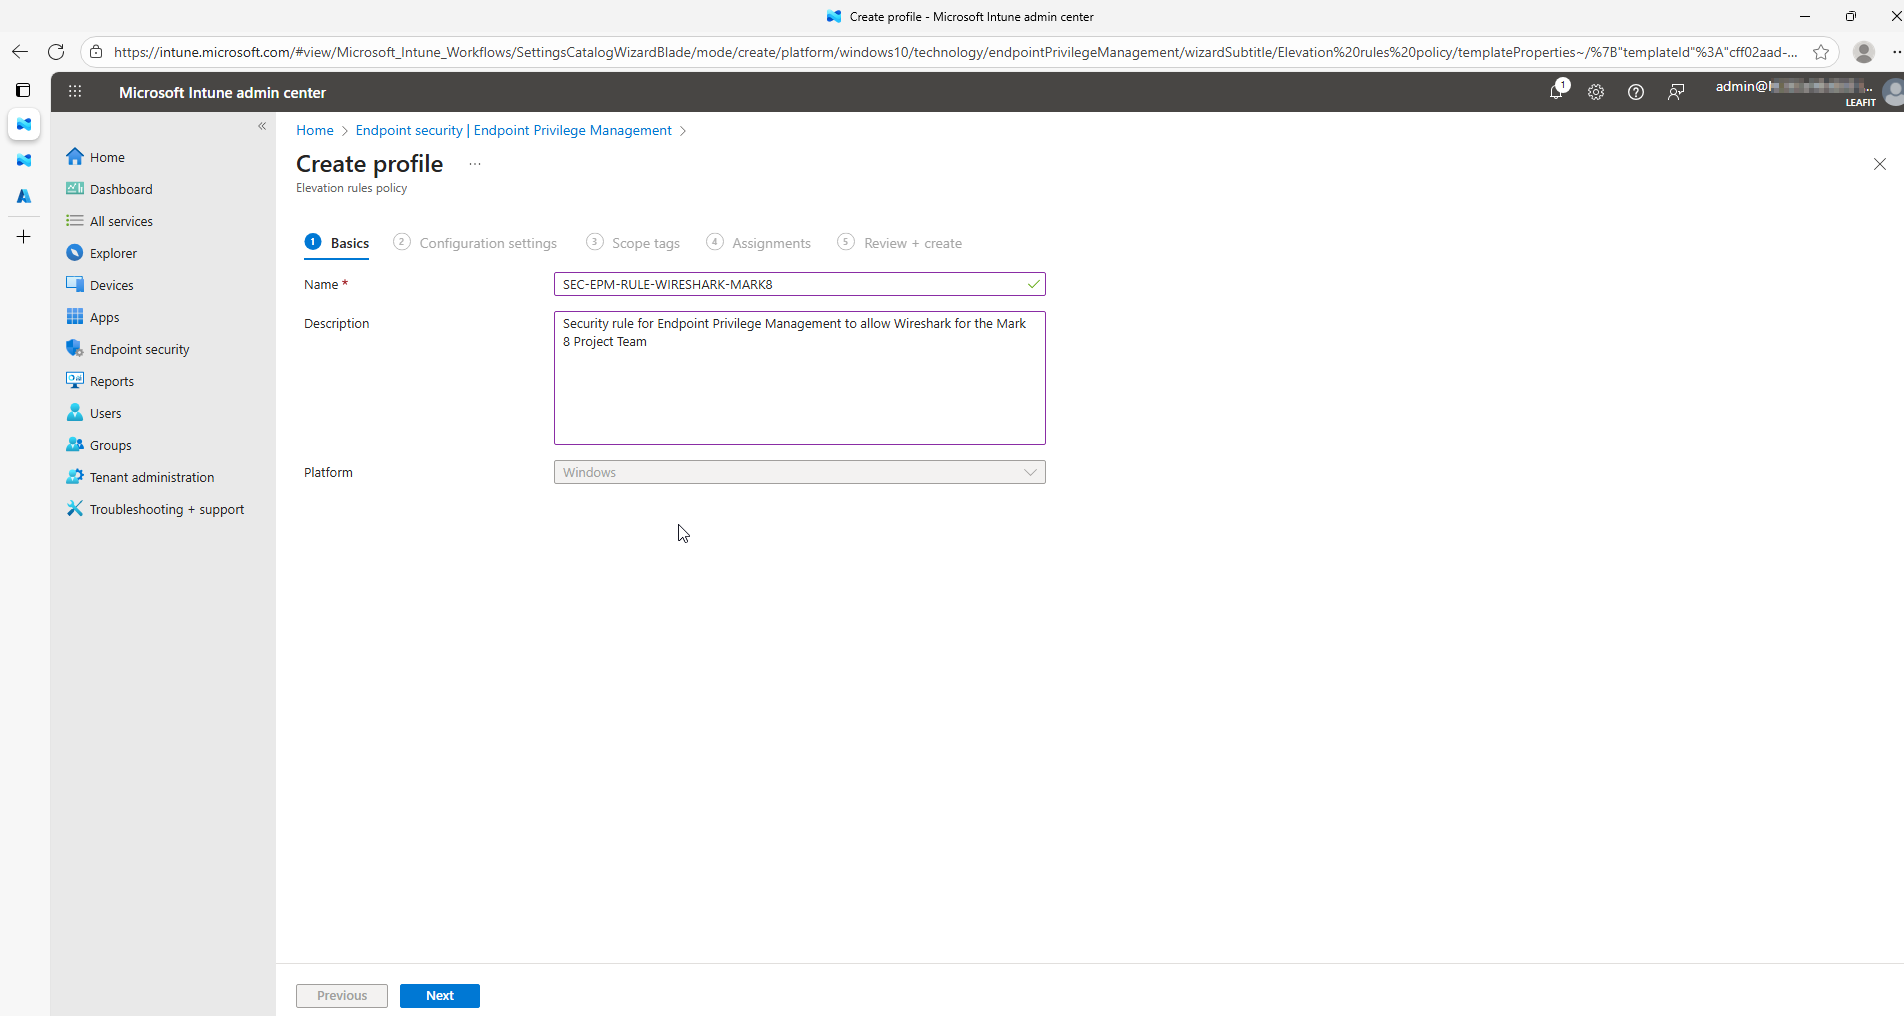
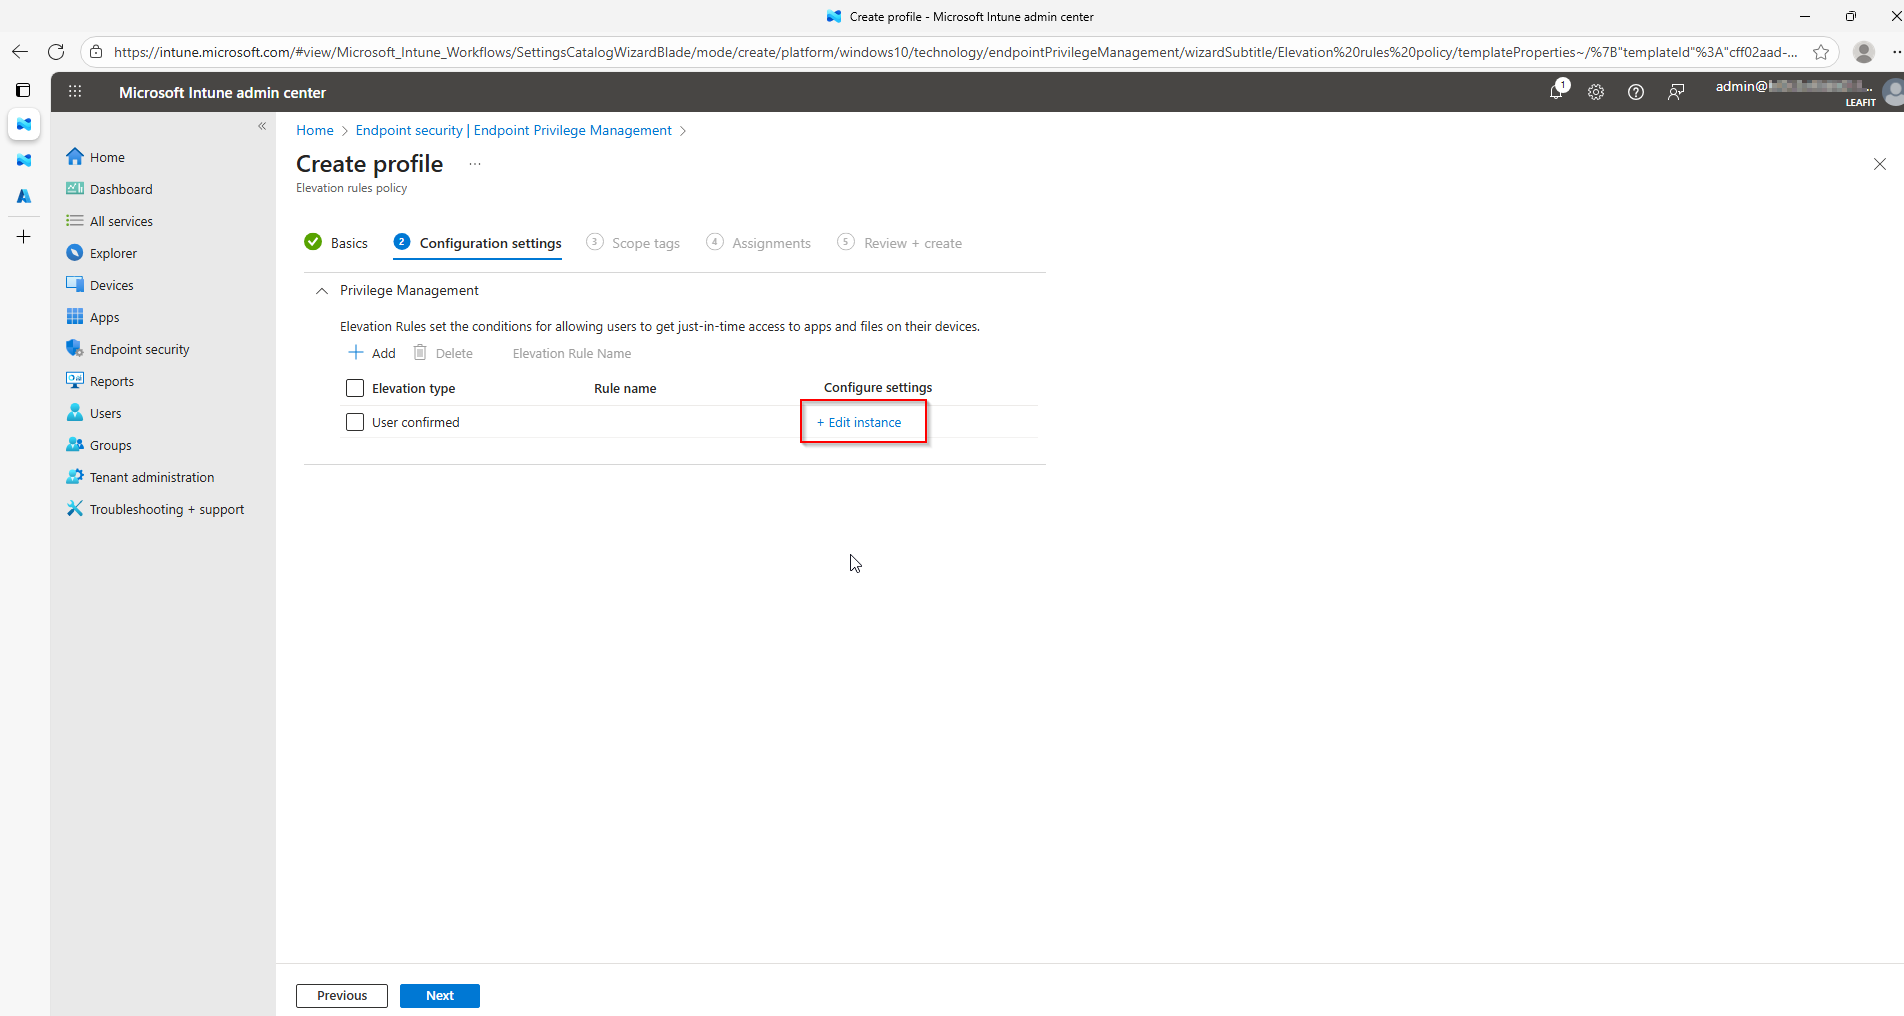
I start of in Microsoft Intune, where I navigate myself to the “Endpoint security”-blade. It is here we will find “Endpoint Privilege Management”. Where we will go to “Policies” and have the option to create a new “Elevation rules policy”.
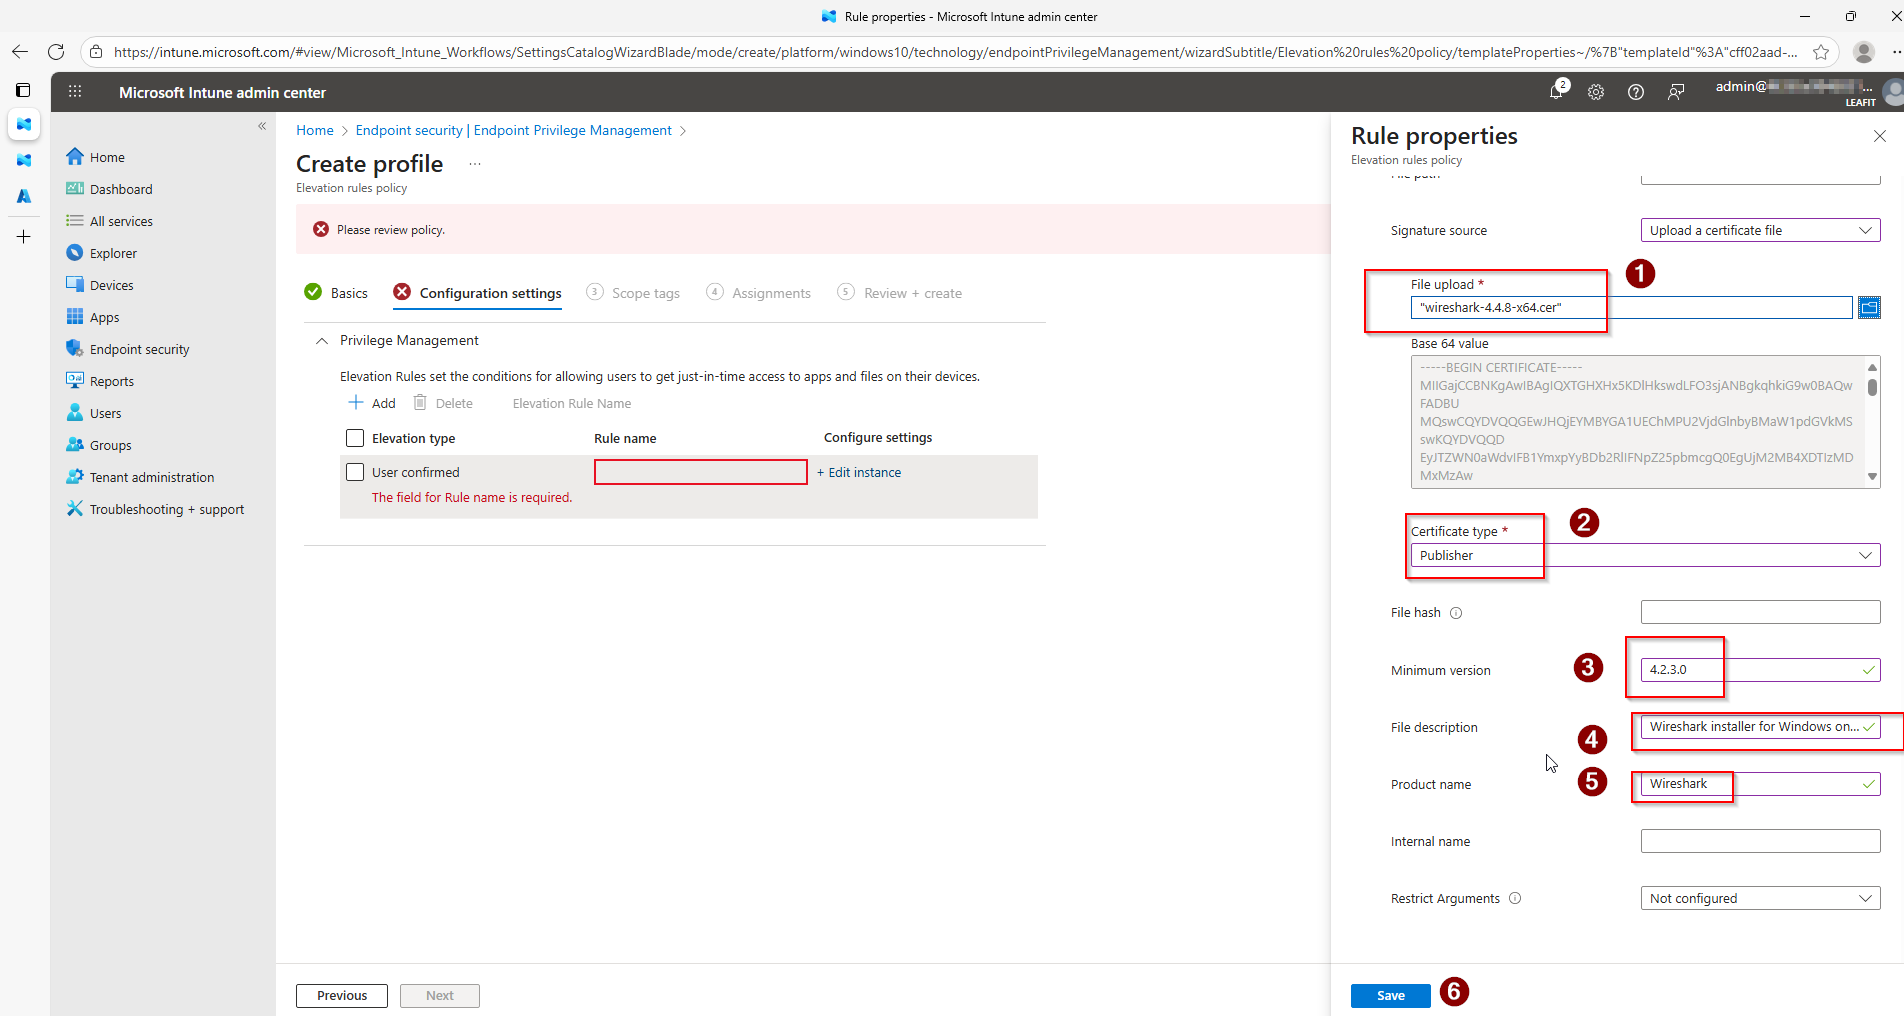
After going through the basics, we will have to fill in more detailed information about the package we are going to add to the rule. This information can be collected using the “EpmTools.dll”.

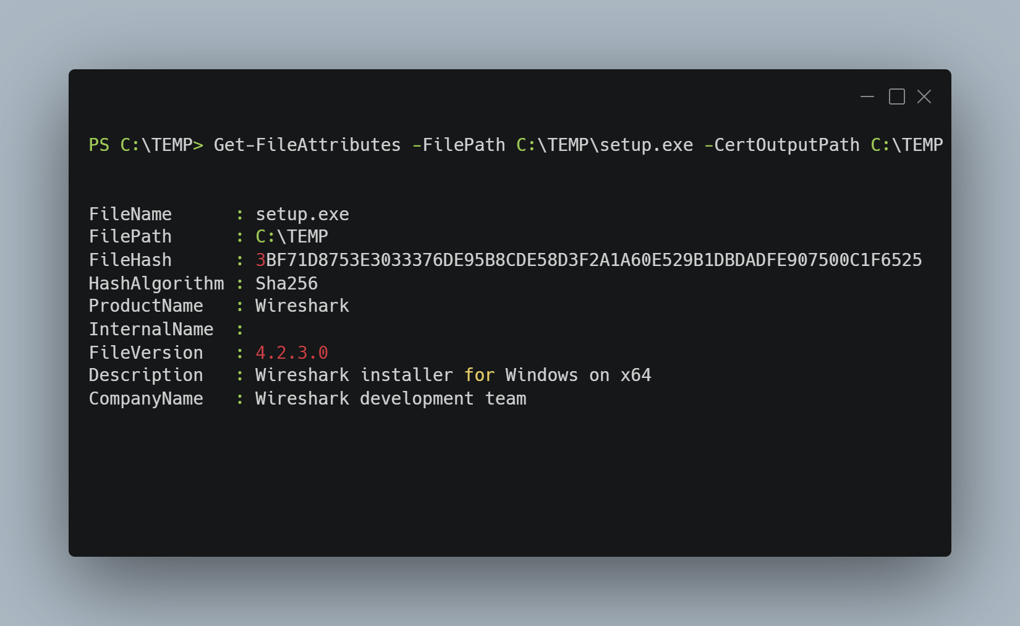
Using this tool it is even possible to extract the publisher certificates out of the file. These can be added to the reusable library.
Finally, we will fill in all the necessary details about the file.
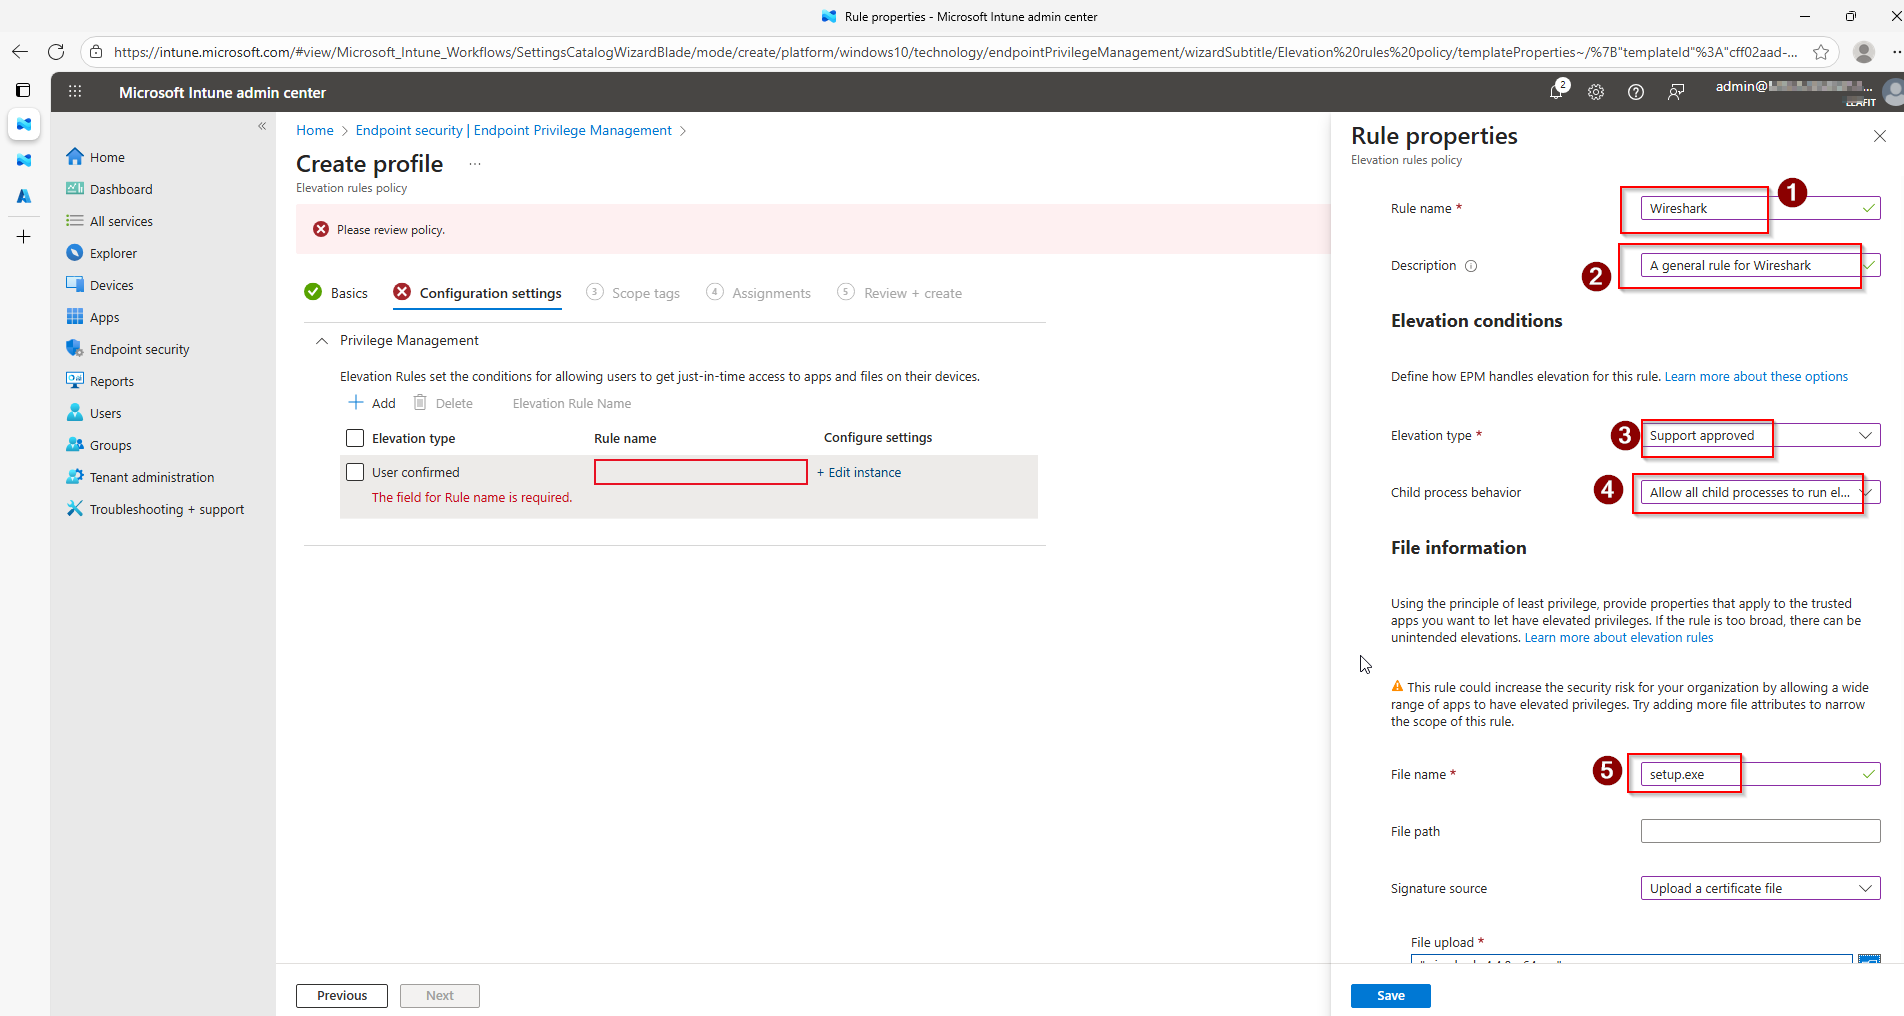
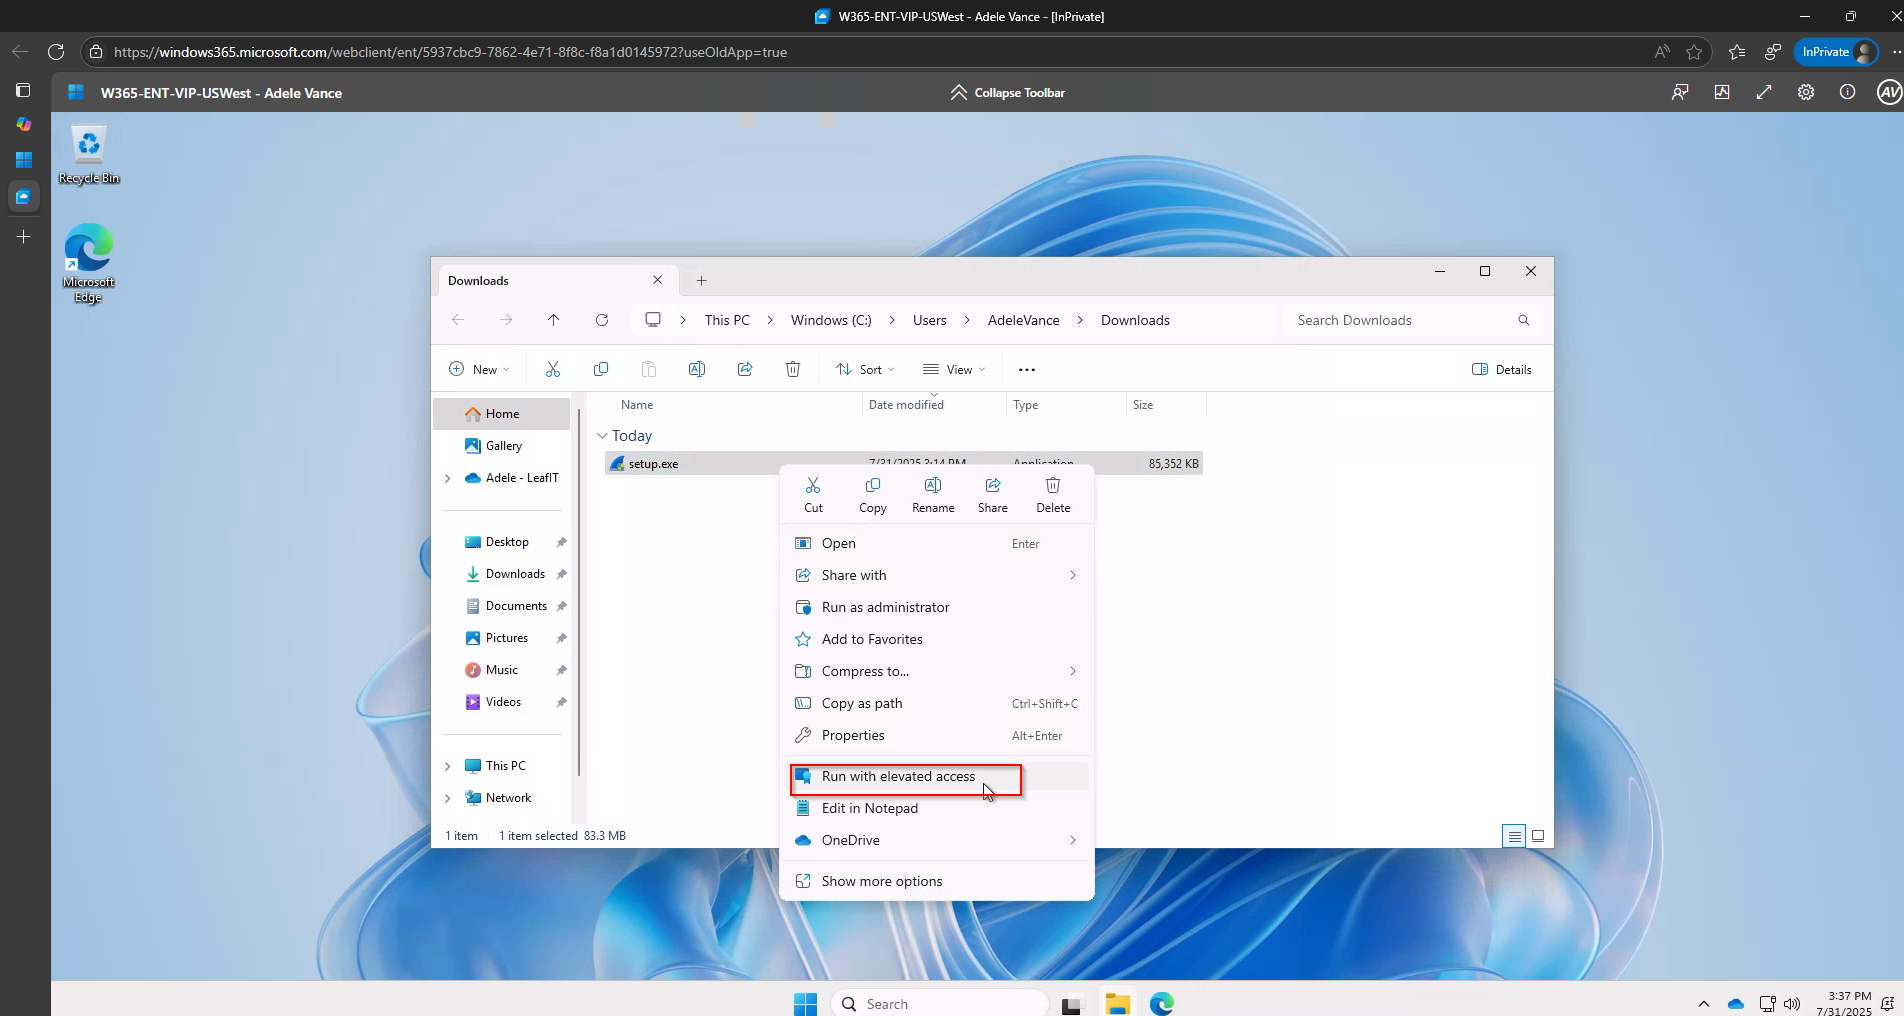
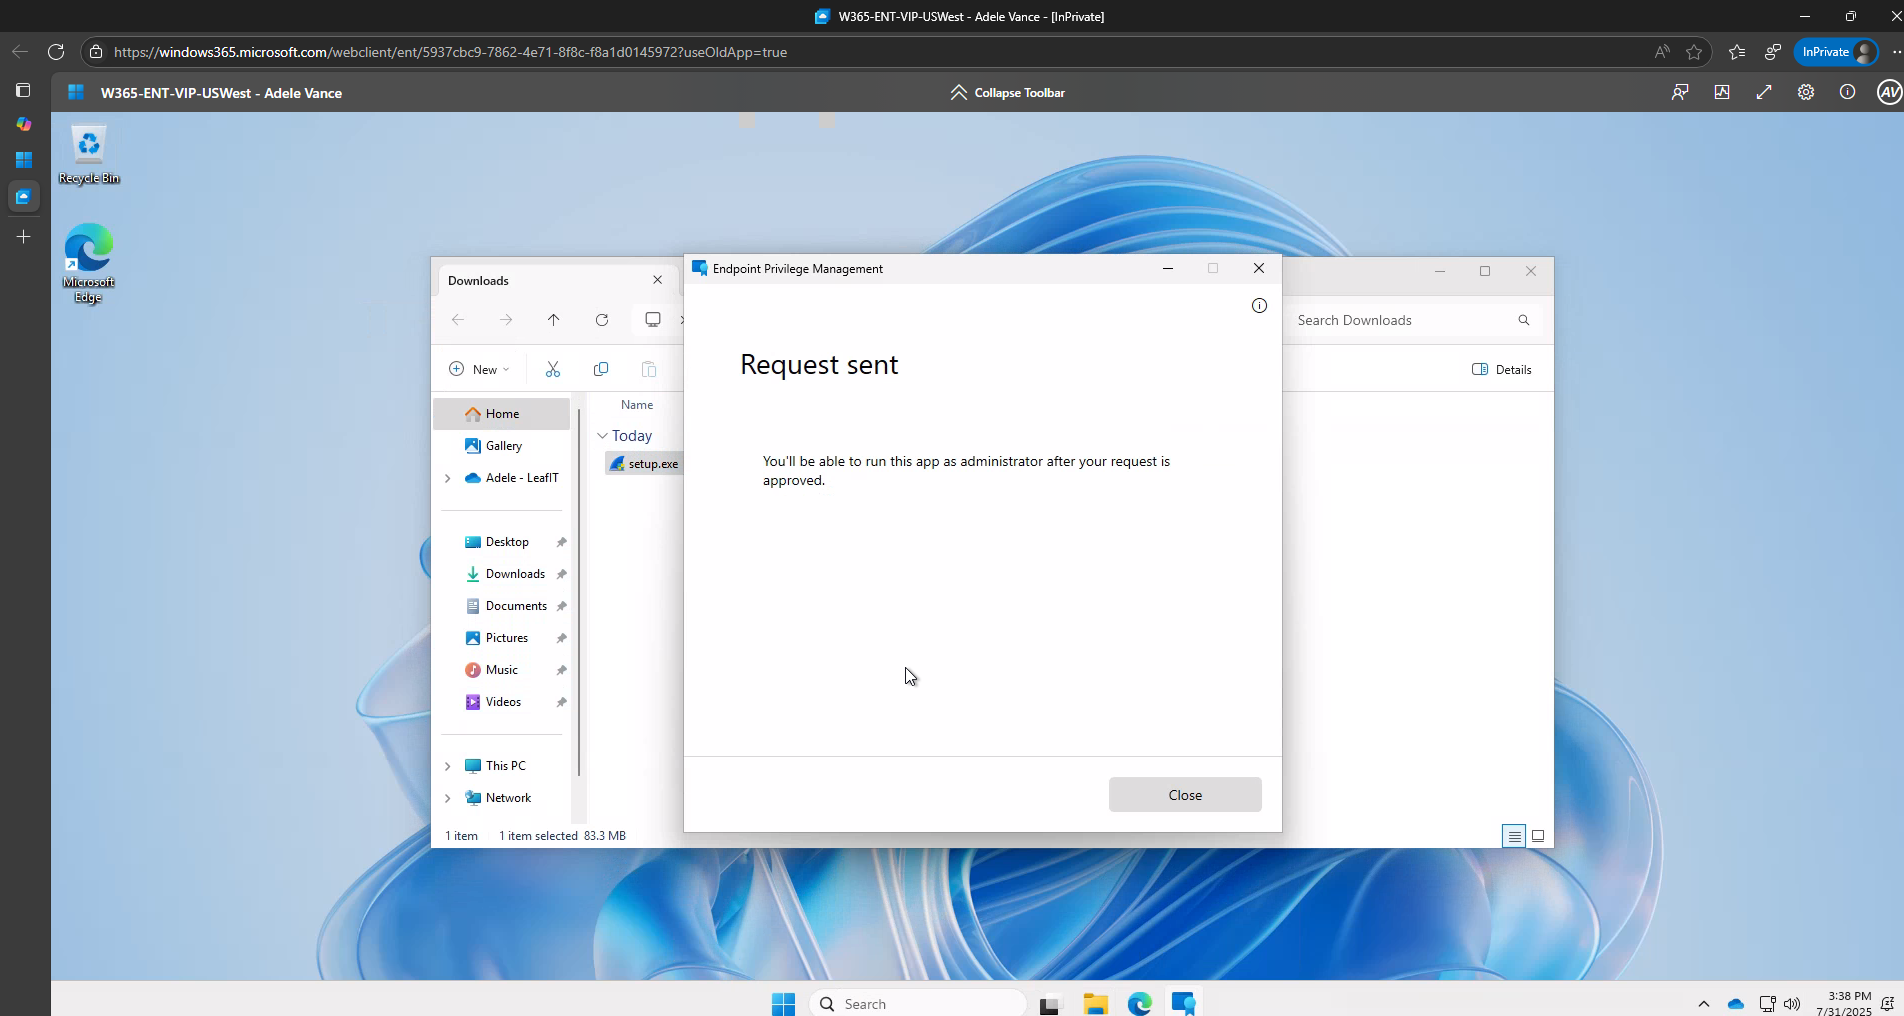
You can easily check if everything was configured correctly by checking it from a demo device. From the end-user perspective the “Run with elevated access”-option should be visible. After which, the elevation request should open.
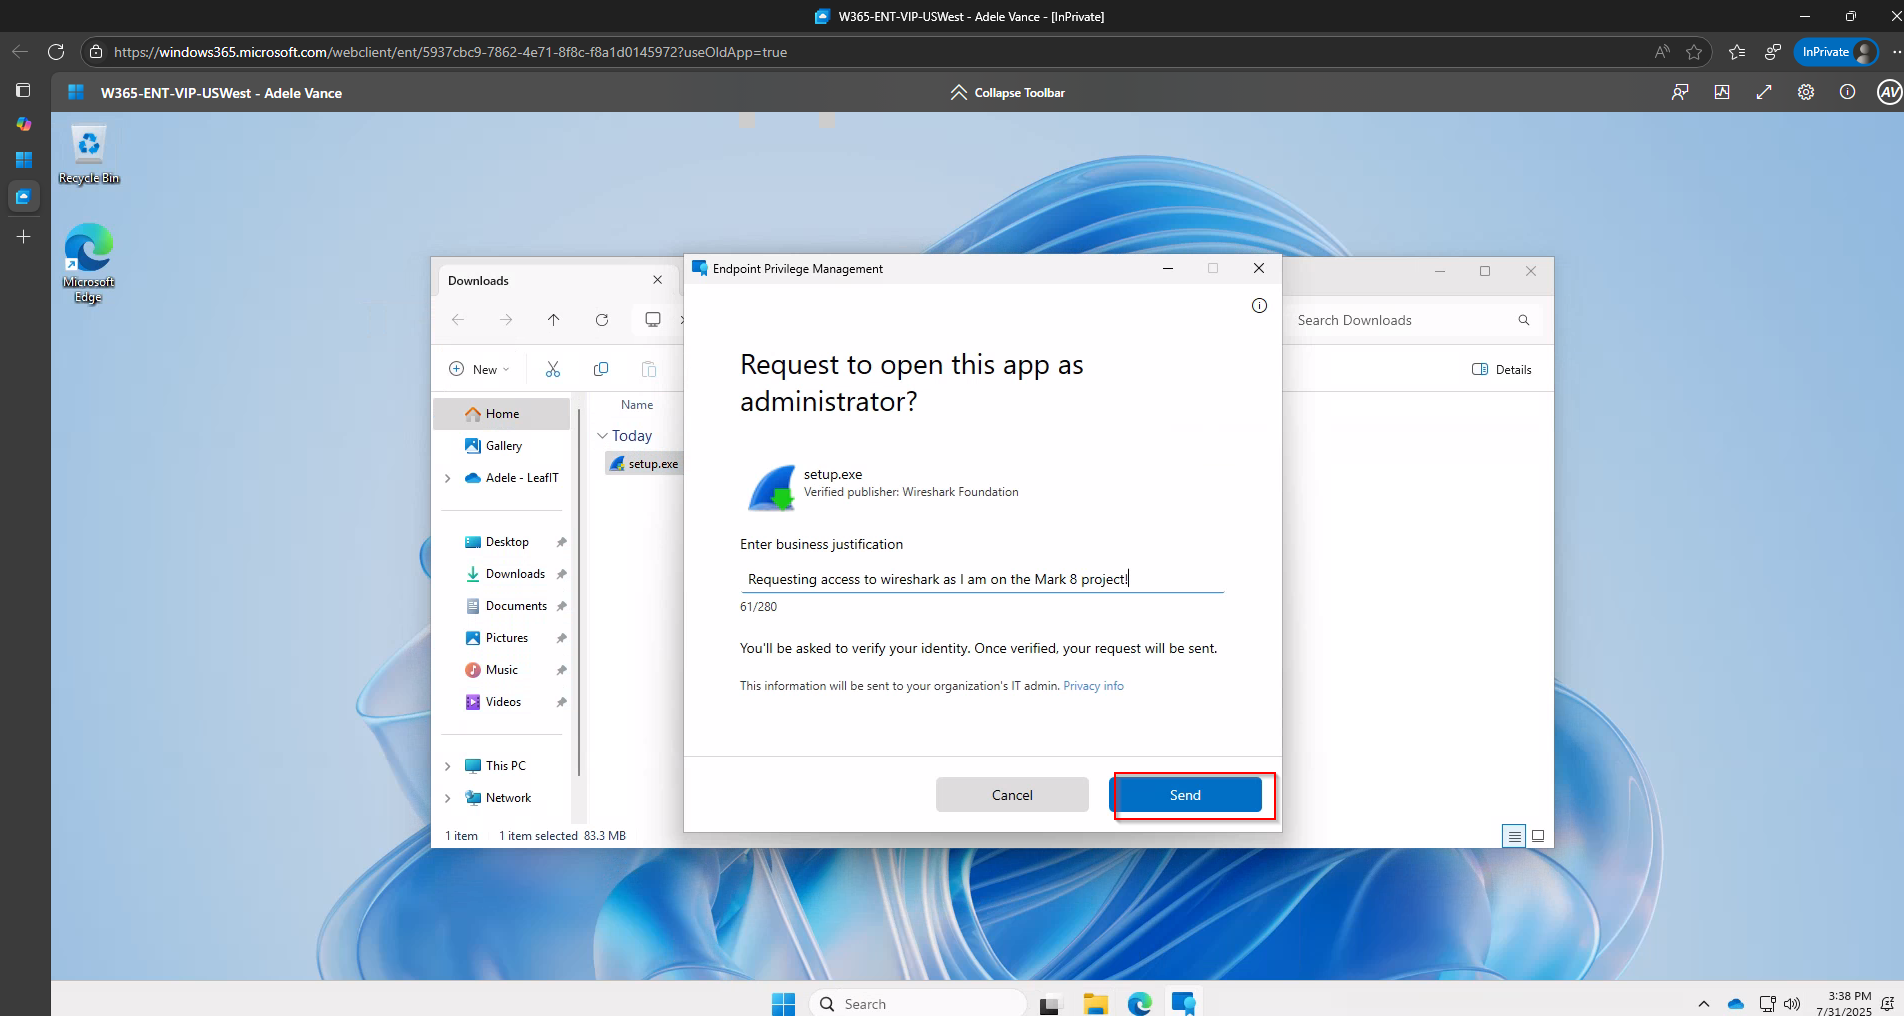
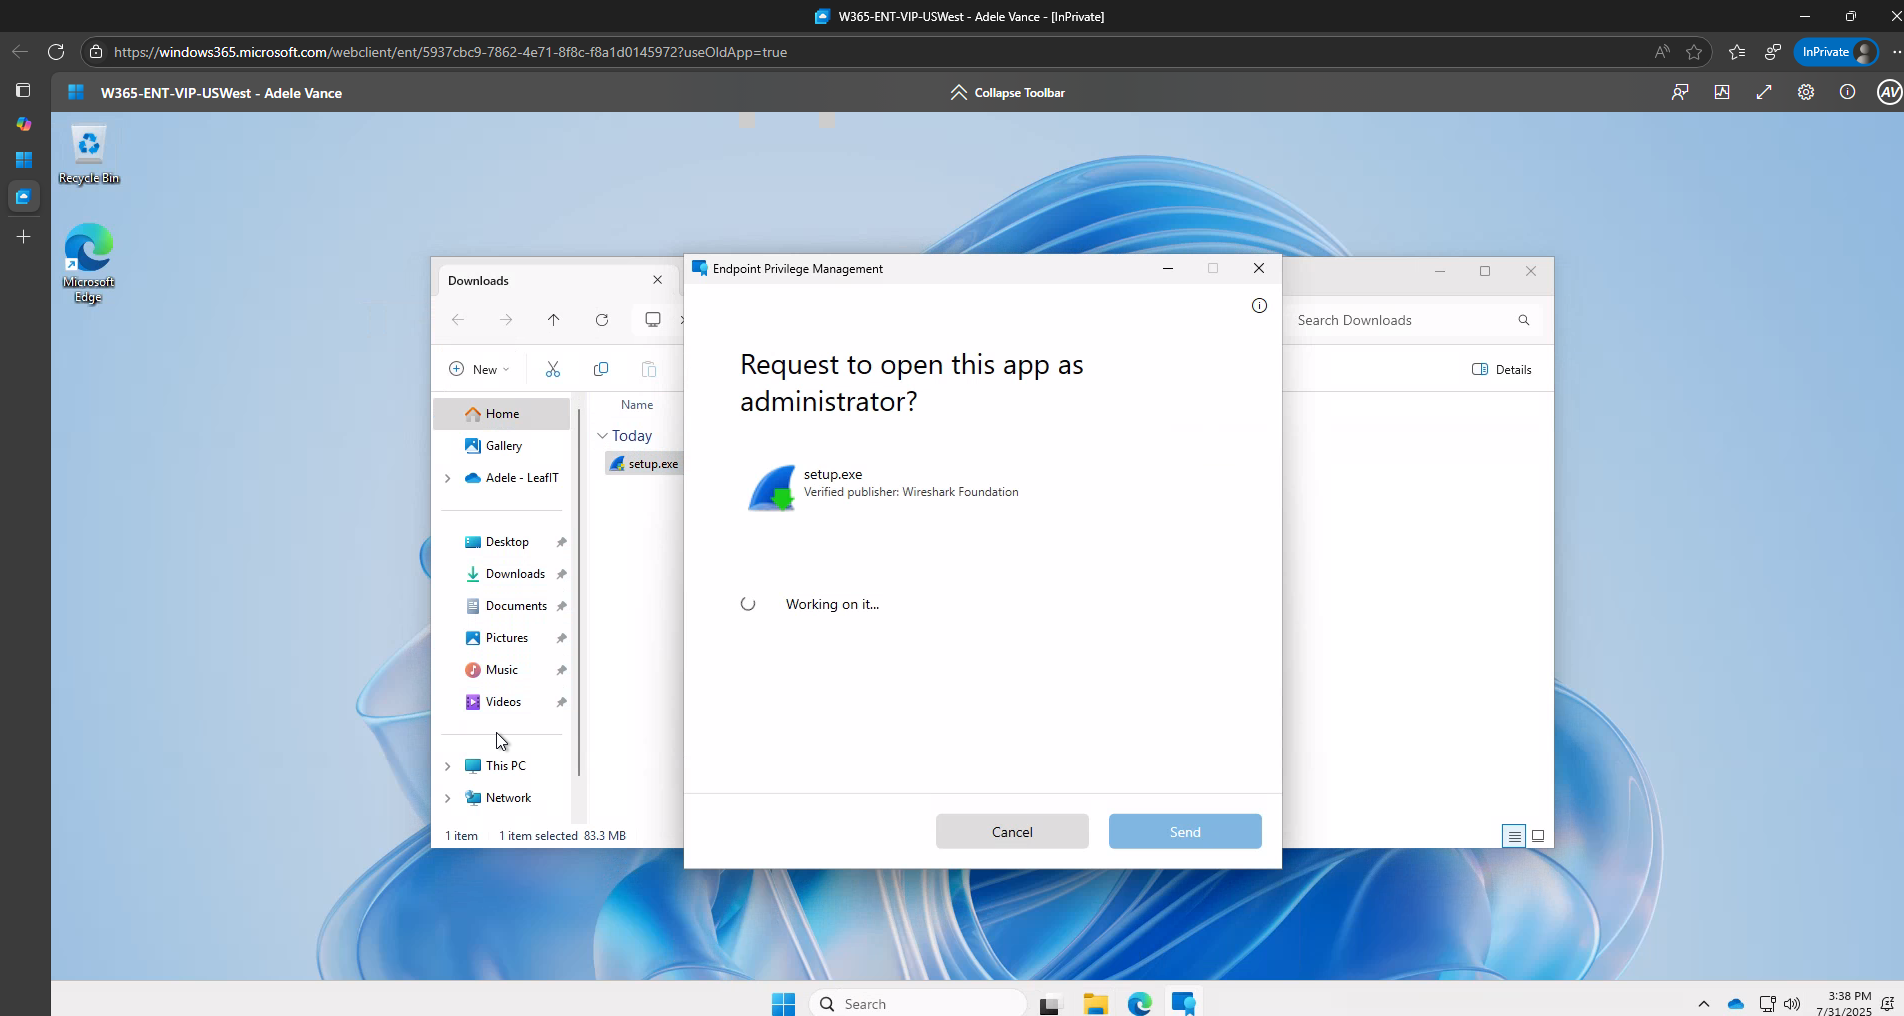
For the Intune administrator the request should come into the “Elevation requests”-tab almost immediately.
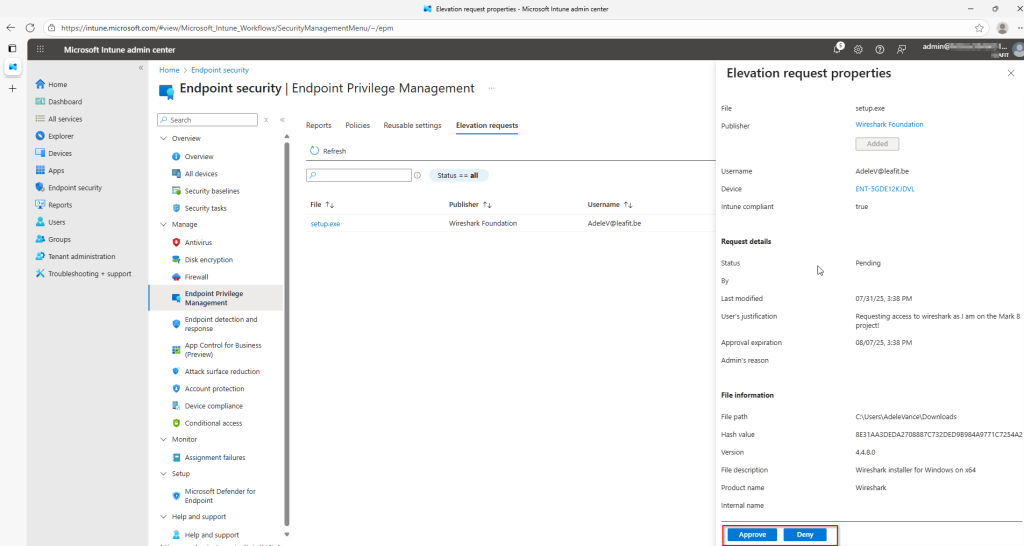
This concludes the basic setup of EPM within this article. This is all we need to verify that there is date being picked up by the GraphAPI. To consume this data we will create an “App registration” in the next step.
Create App registration with correct permissions
First of all, we want to make sure that our data is being picked up in the GraphAPI. This should not be an issue as all components of the Intune Suite are connected to the GraphAPI.
Through the Graph Explorer, you can easily check the date under “deviceManagement/elevationRequests”.
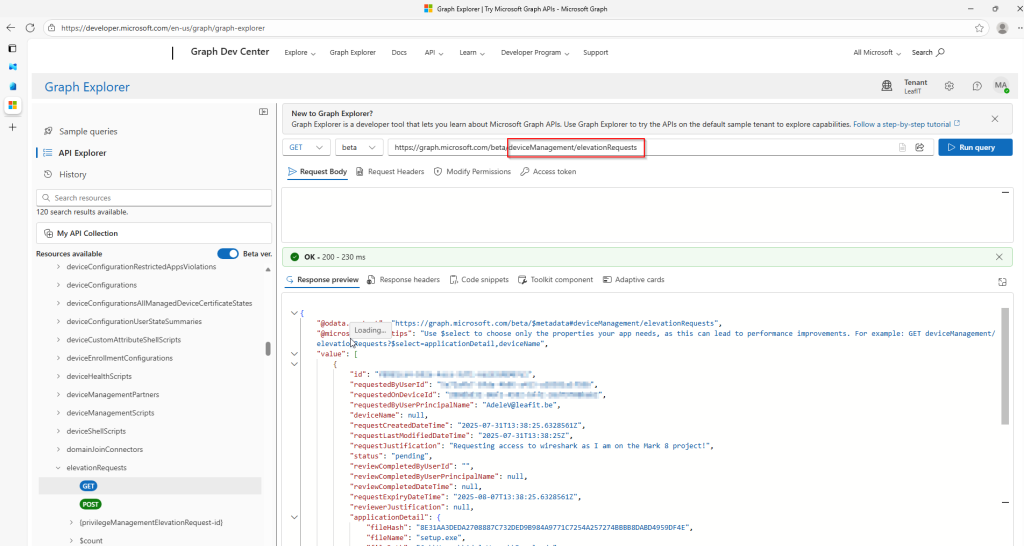
Be aware to check that you are using the beta version of the api and that “DeviceManagementConfiguration.Read.All” has been granted to the Graph Explorer. Otherwise it will return a permission error.
Creating an app registration is quite easy, but will allow us to grant these permissions there and not have to worry about authentication in our EPMChatbot.
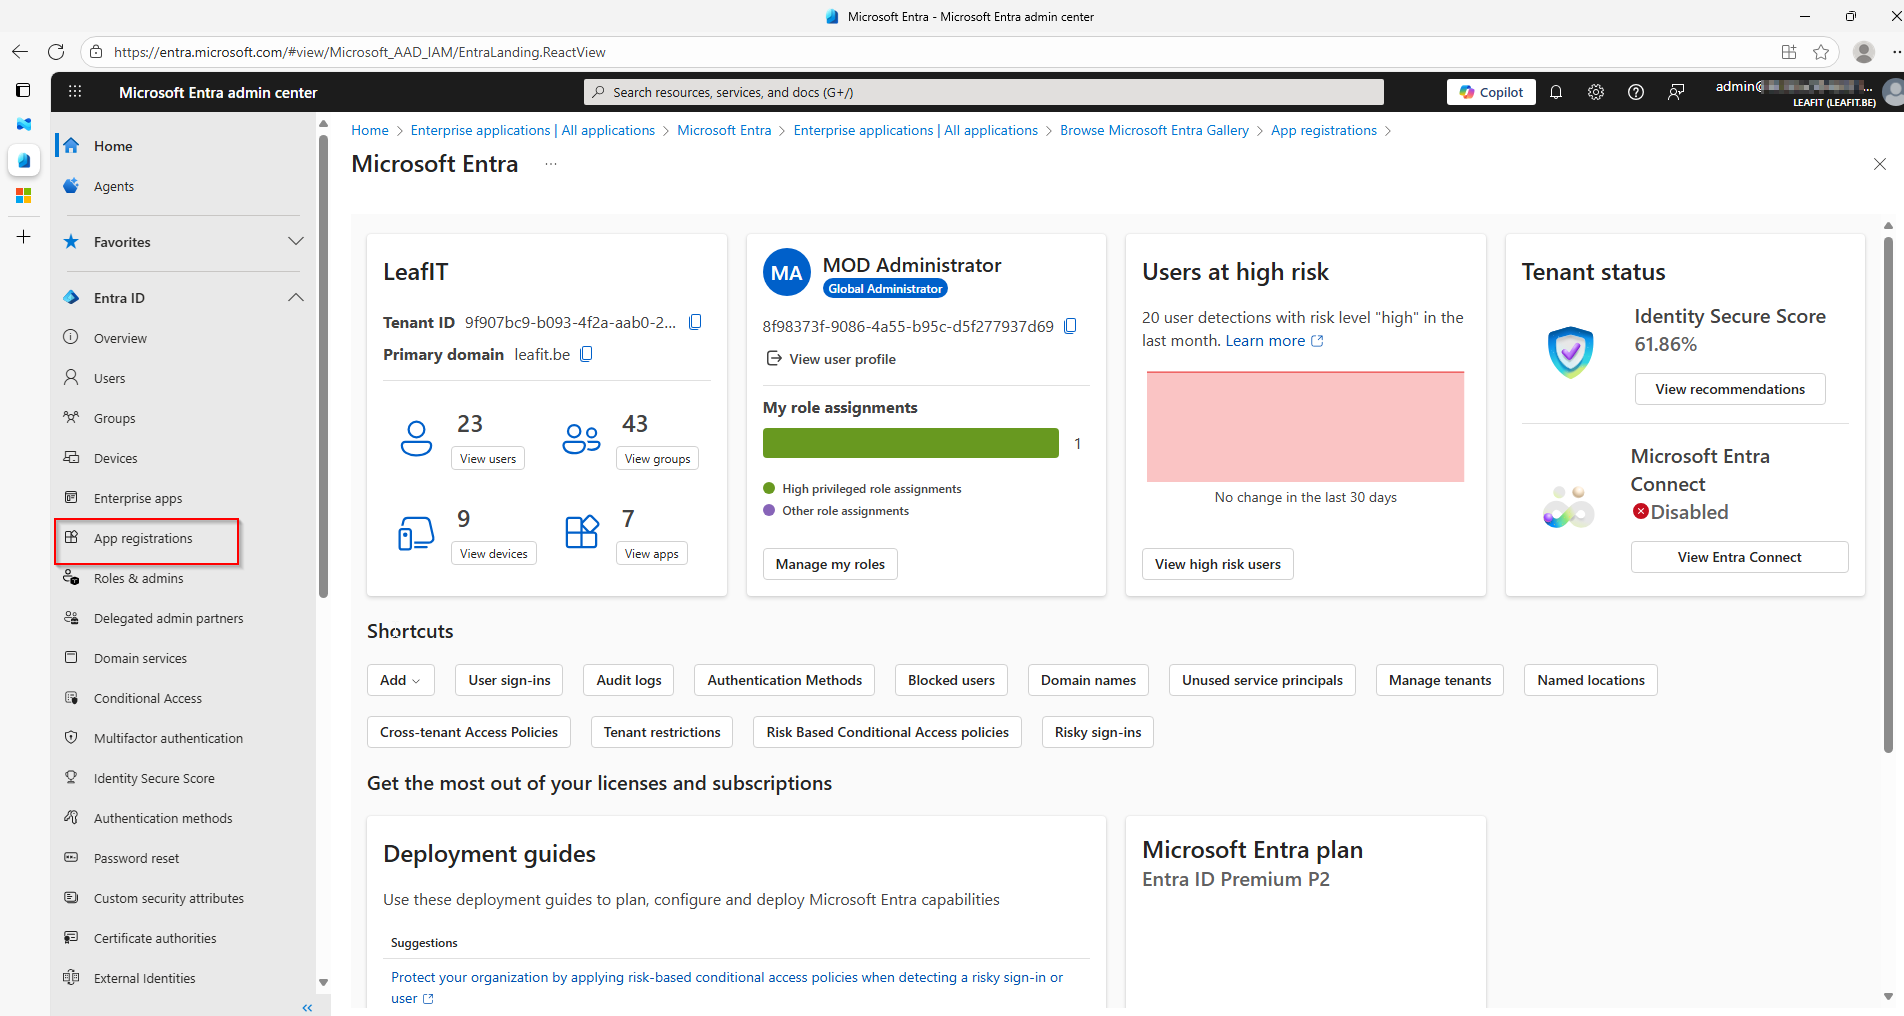
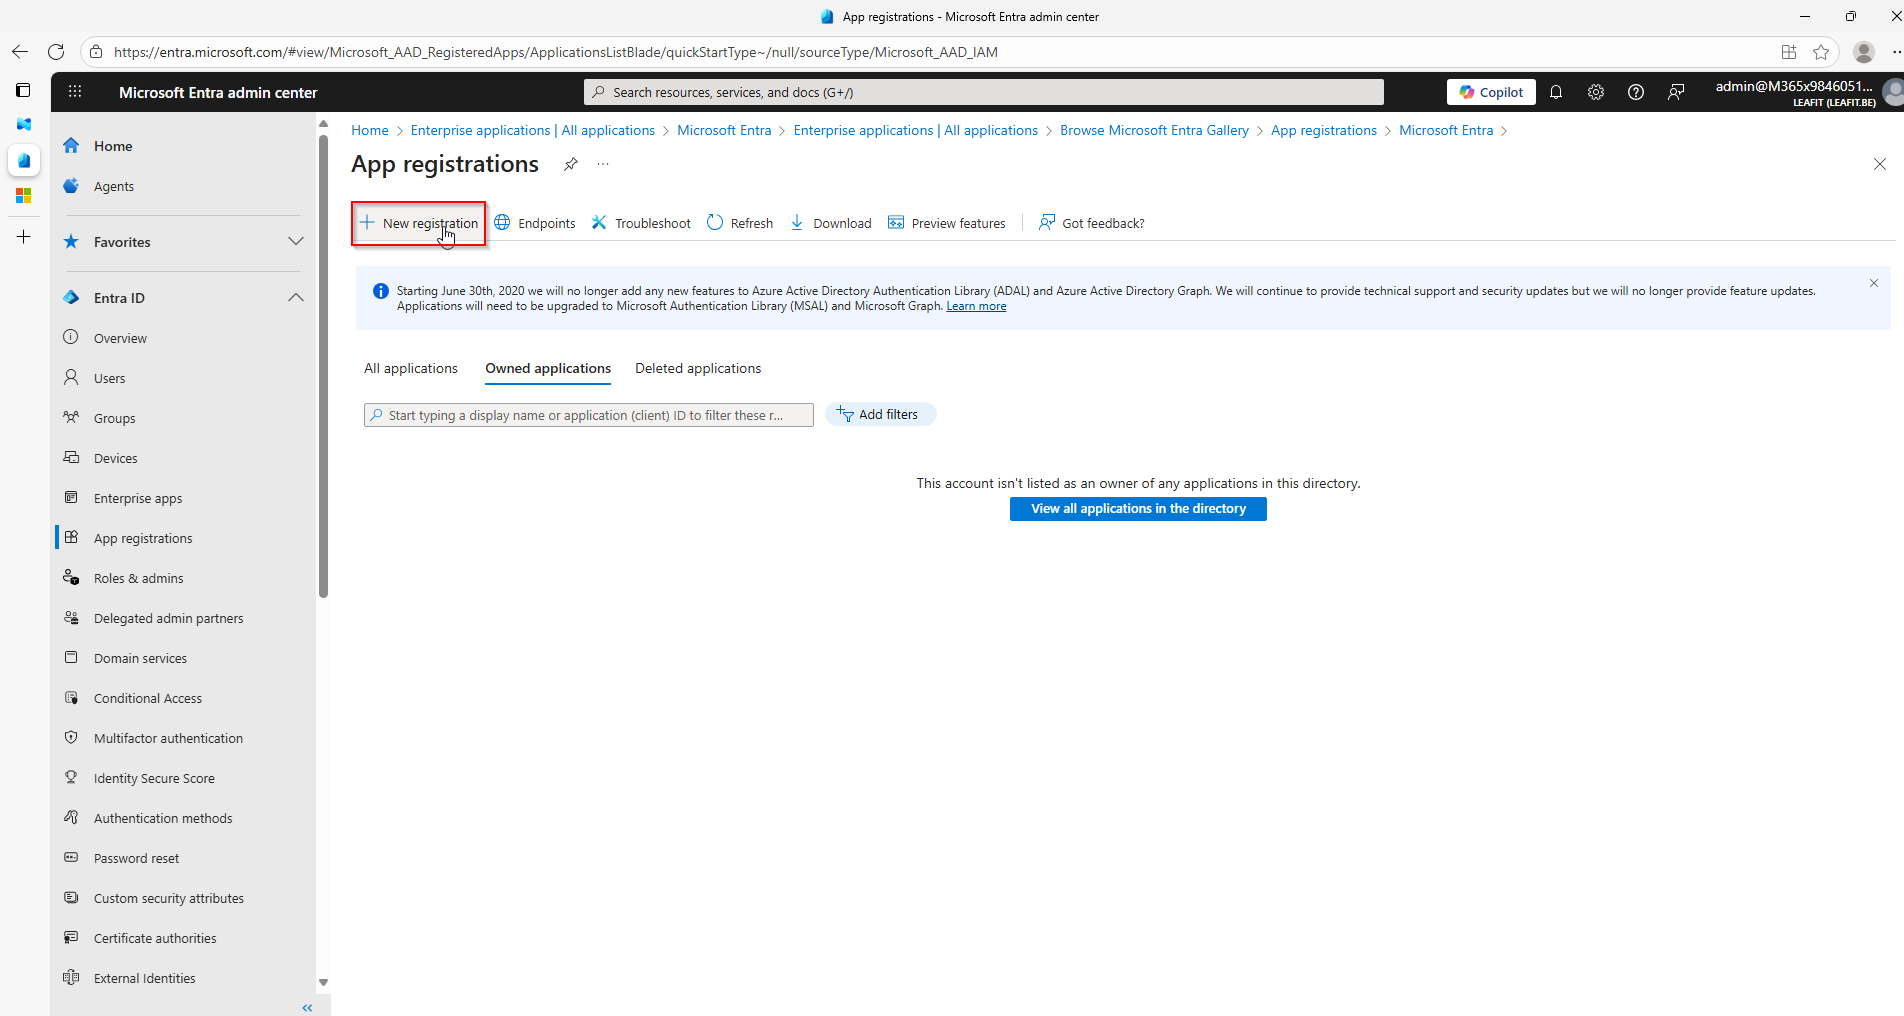
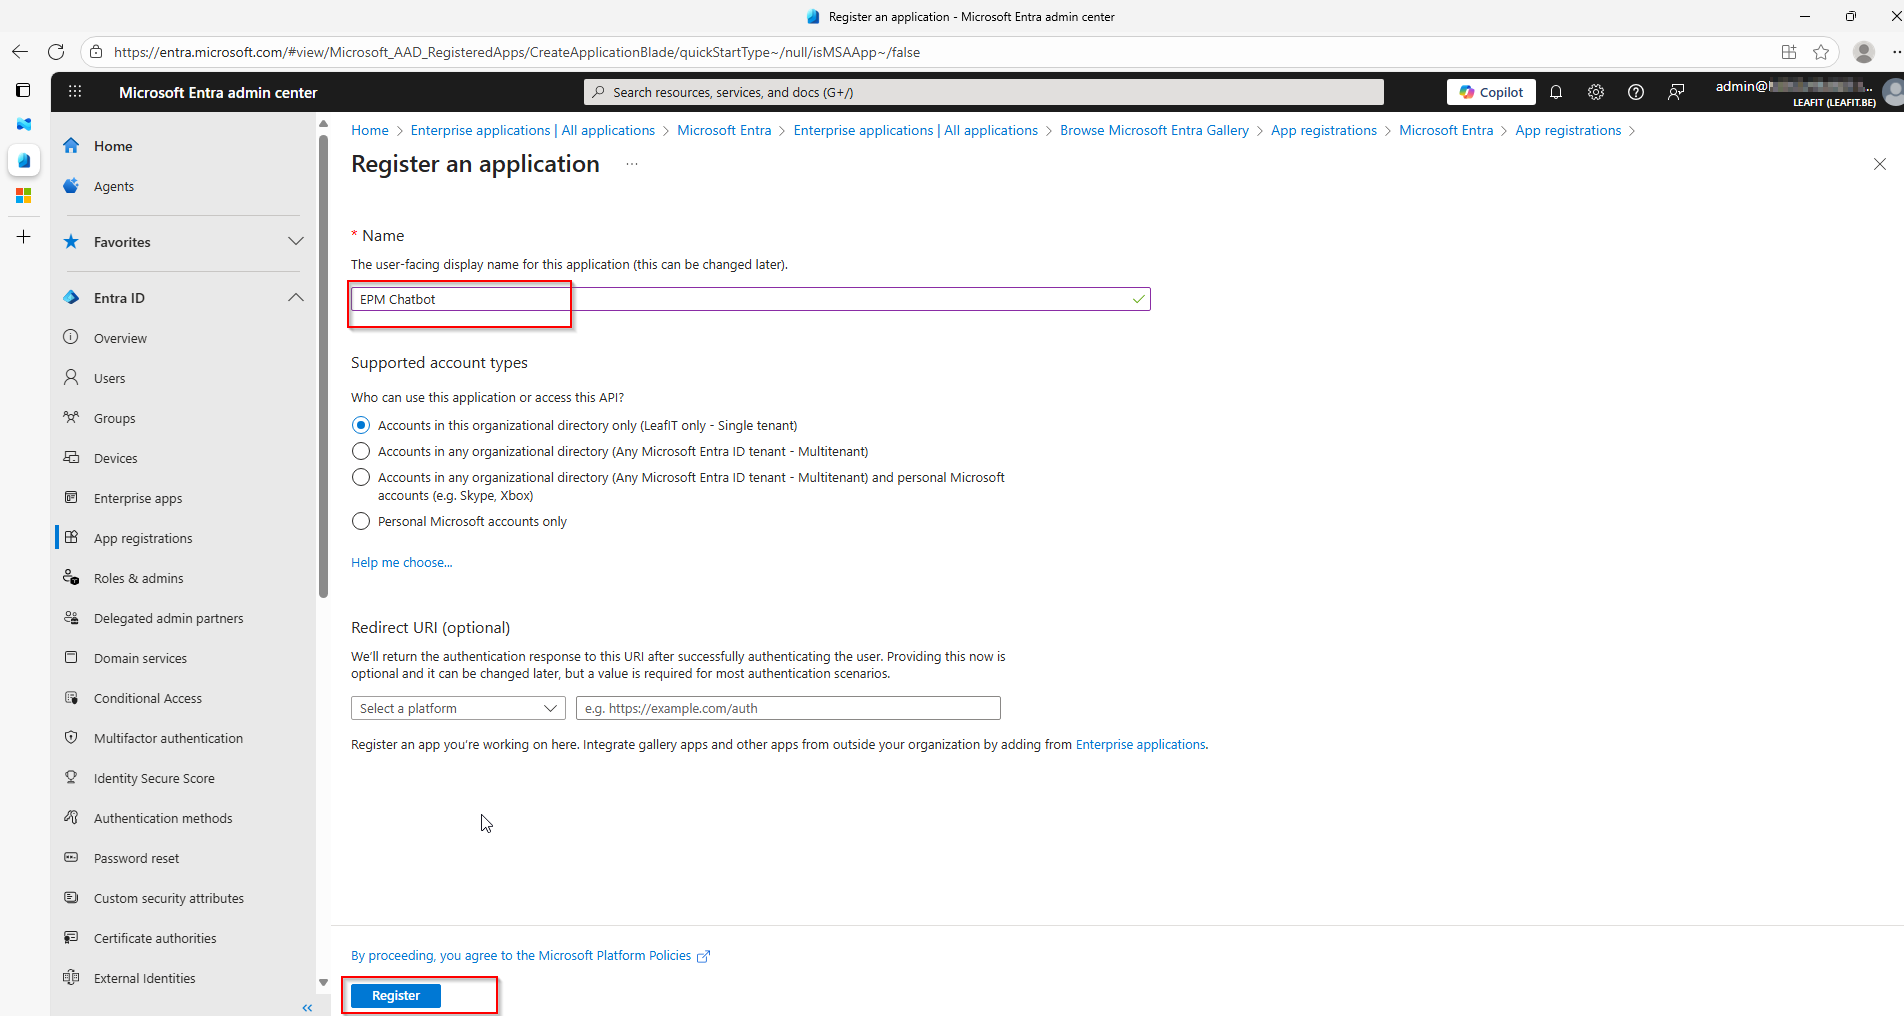
Once this is done, we will configure the API permissions. As said above, the only permission we need is the “DeviceManagementConfiguration.Read.All”.
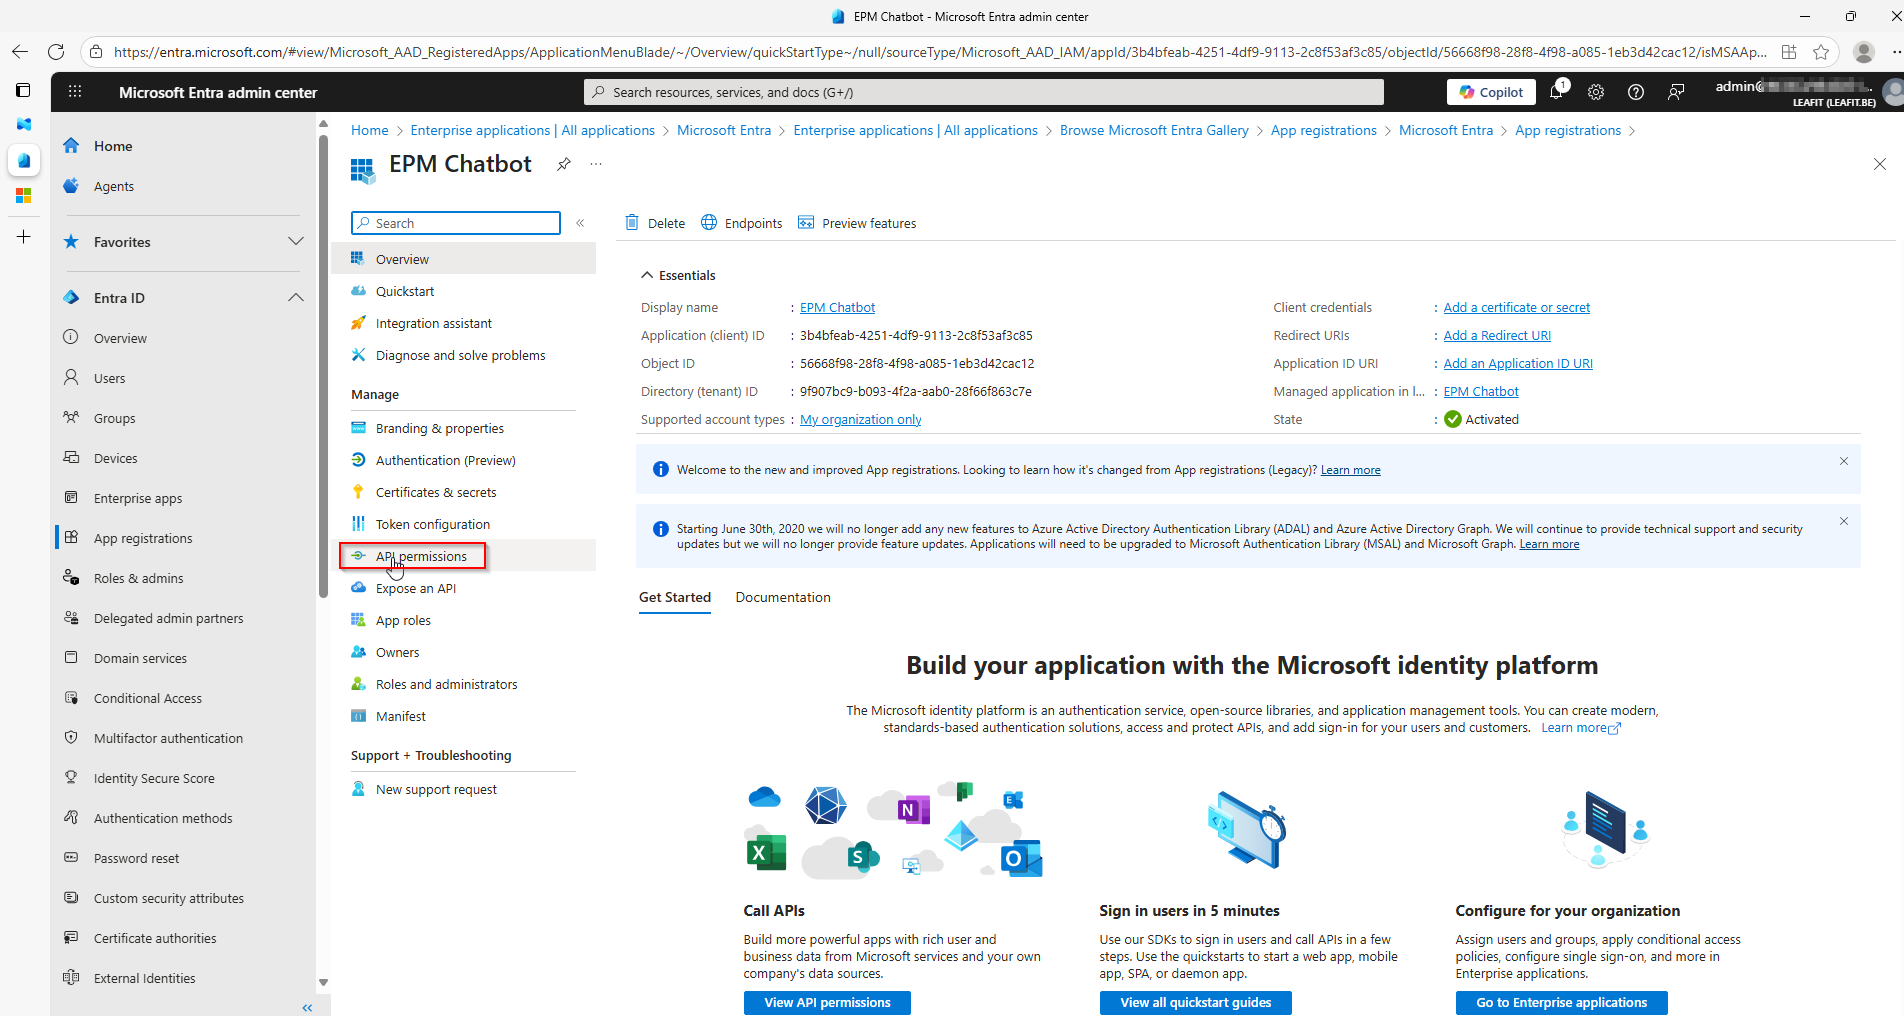
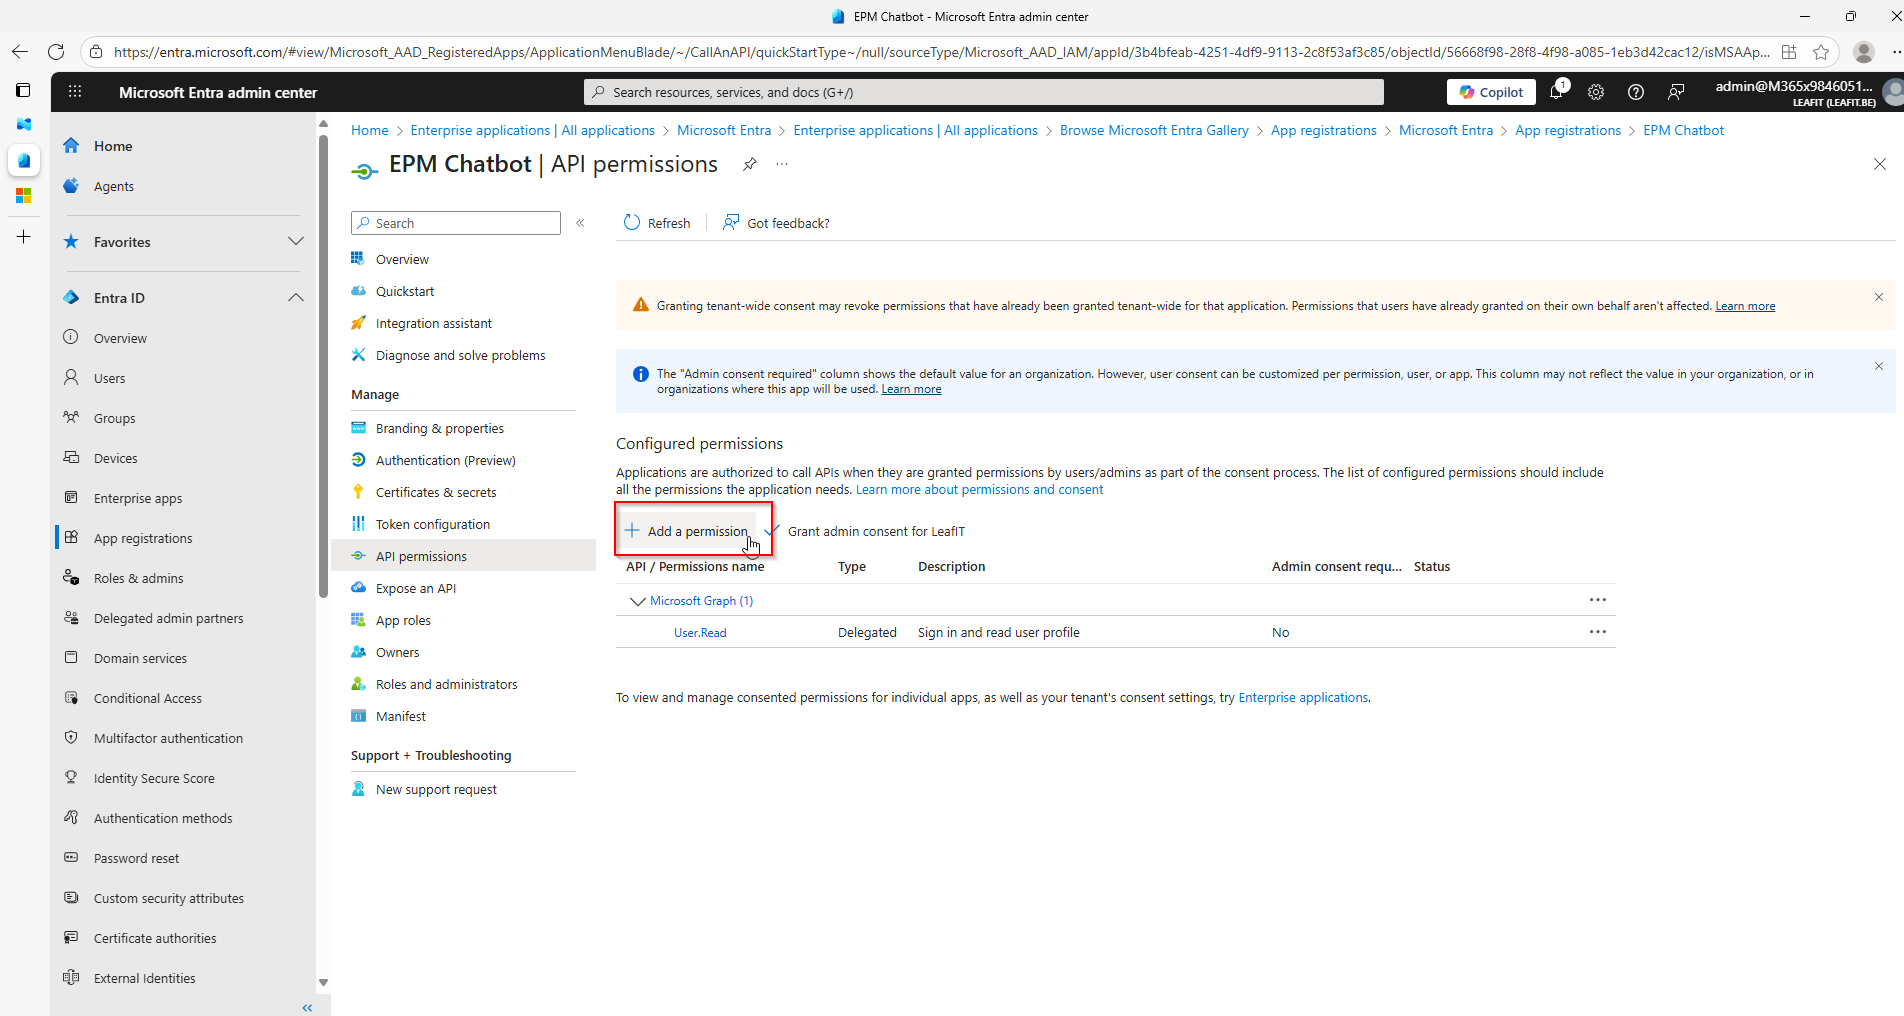
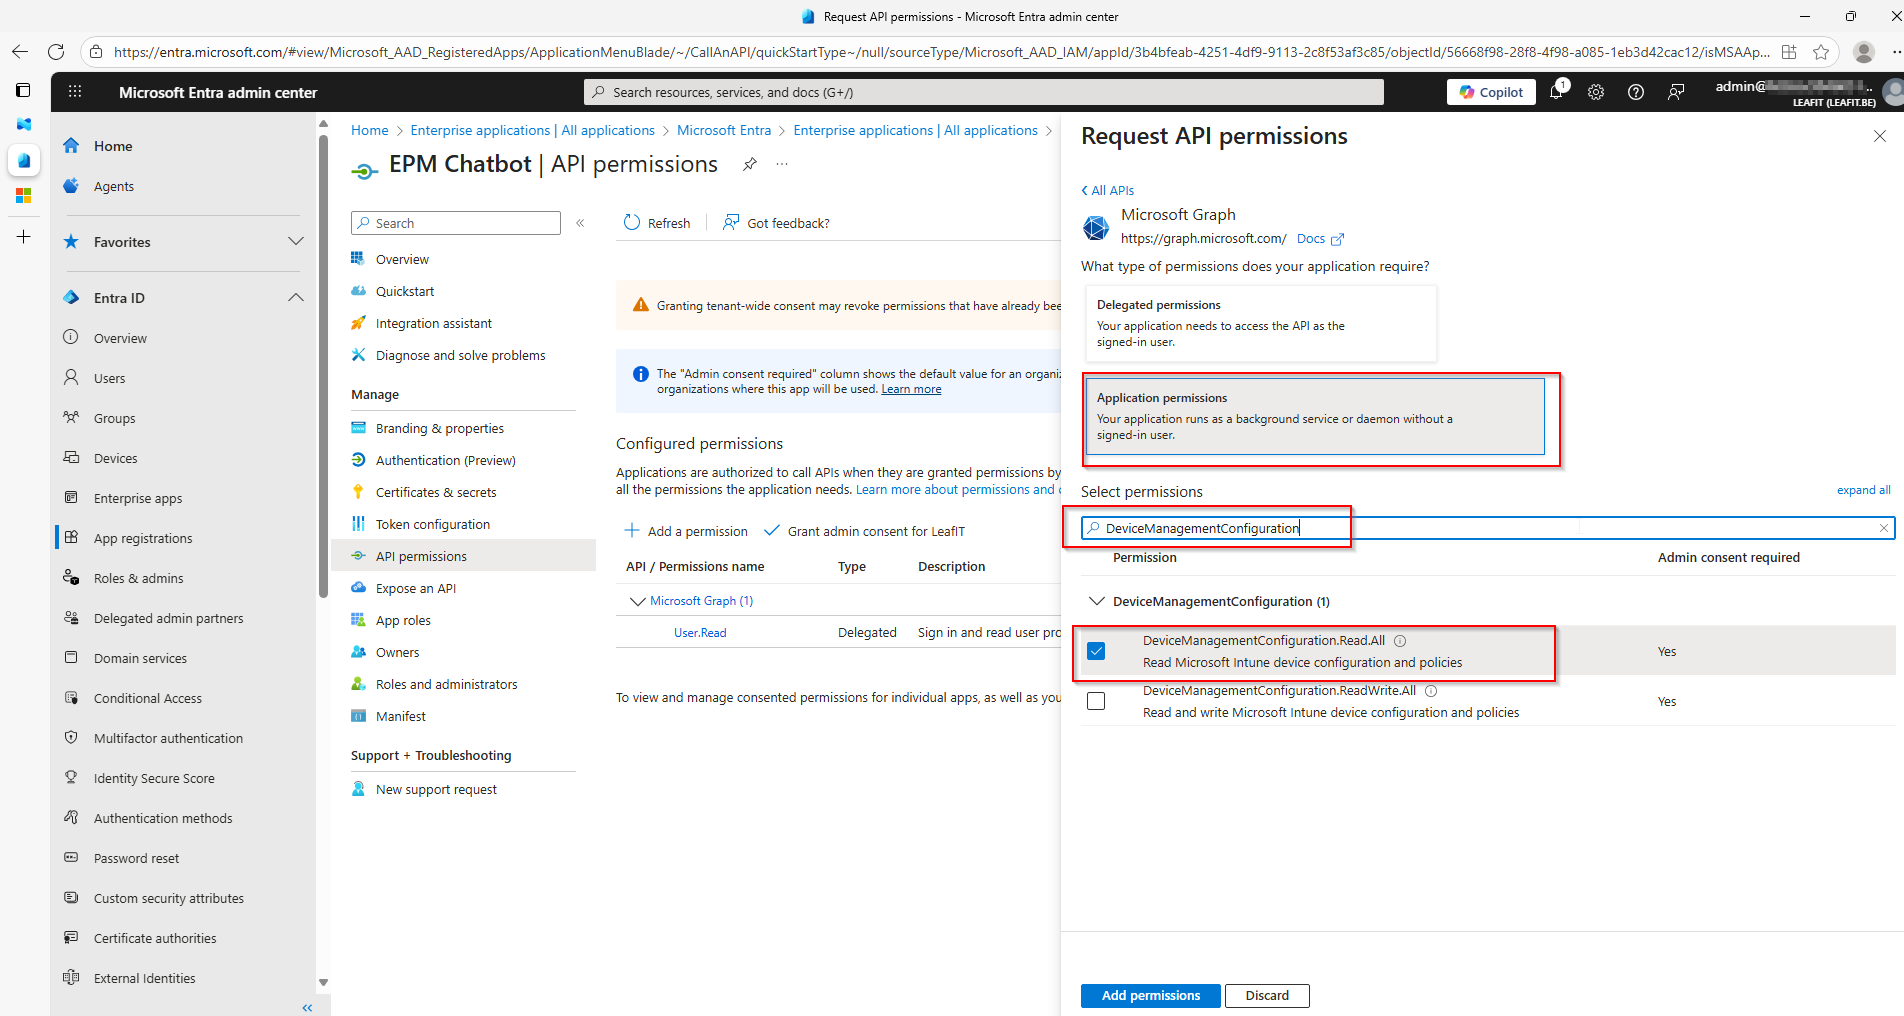
Make sure to also “Grant admin consent for <yourOrganisation>”.
Our final step is to create the Client secret that can be used by our Azure Logic App.
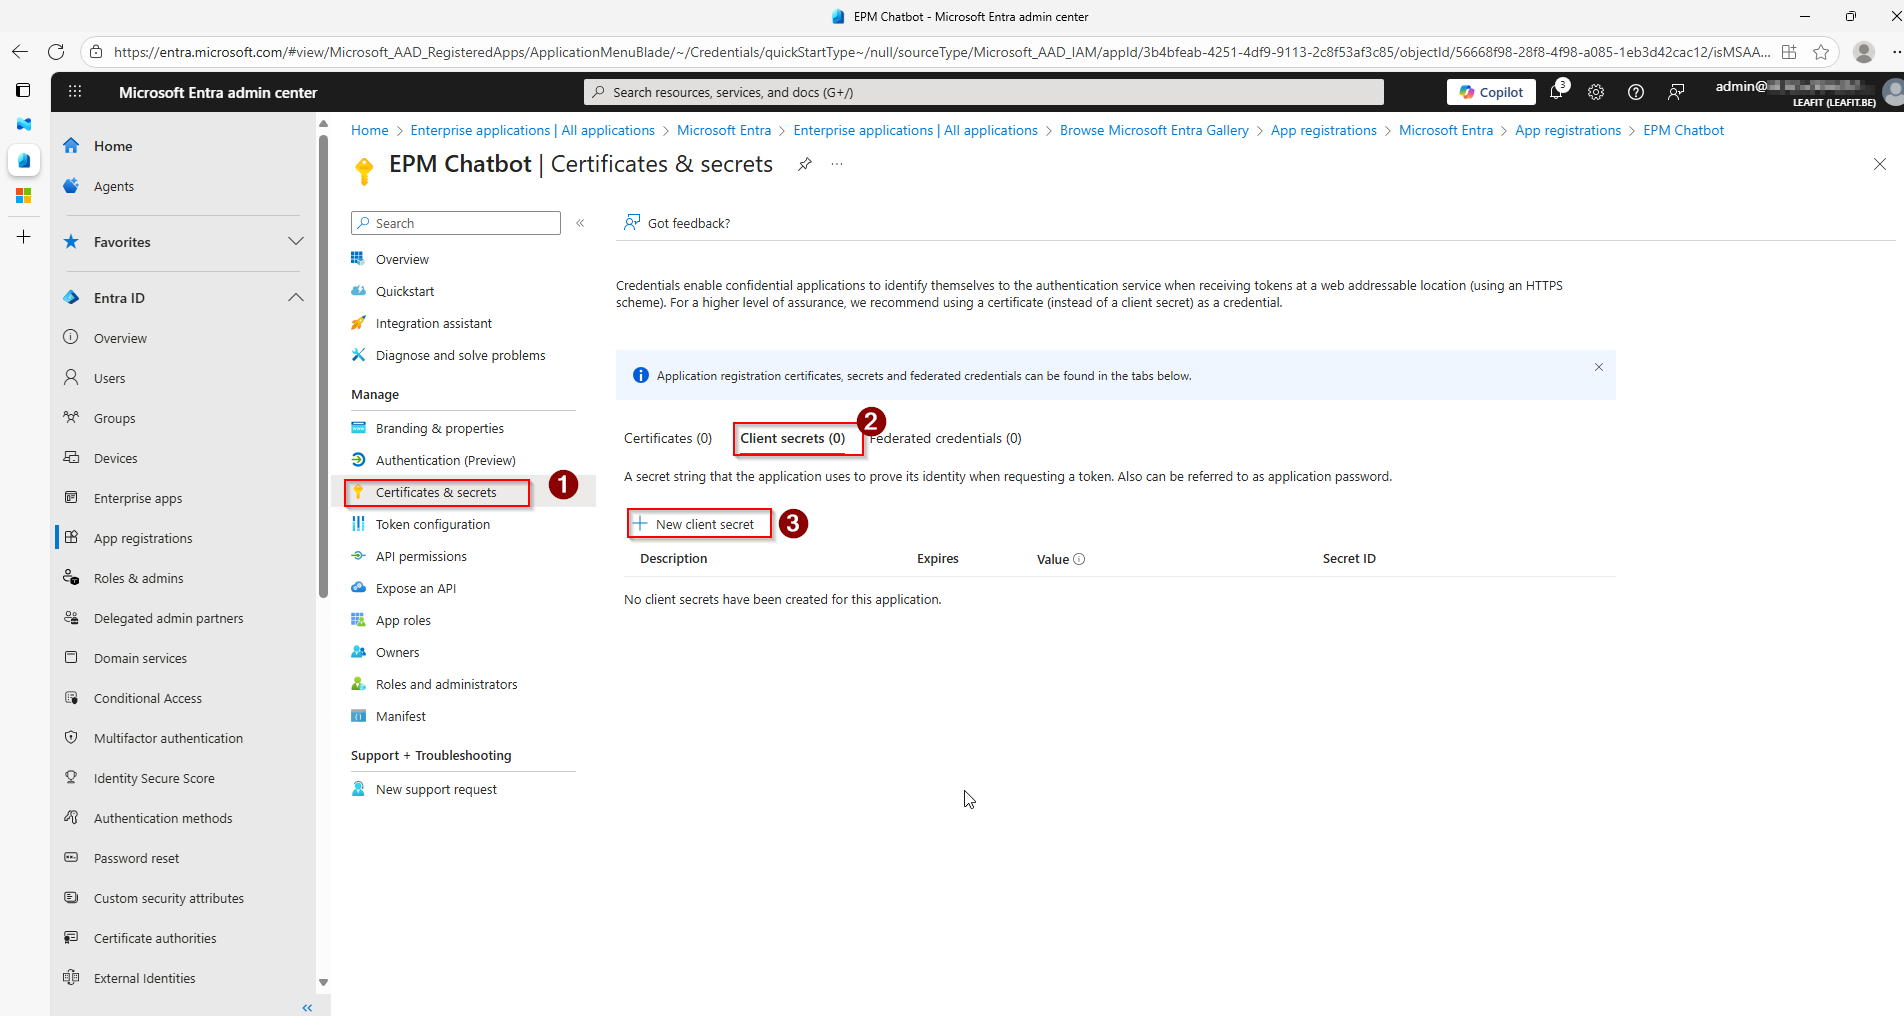
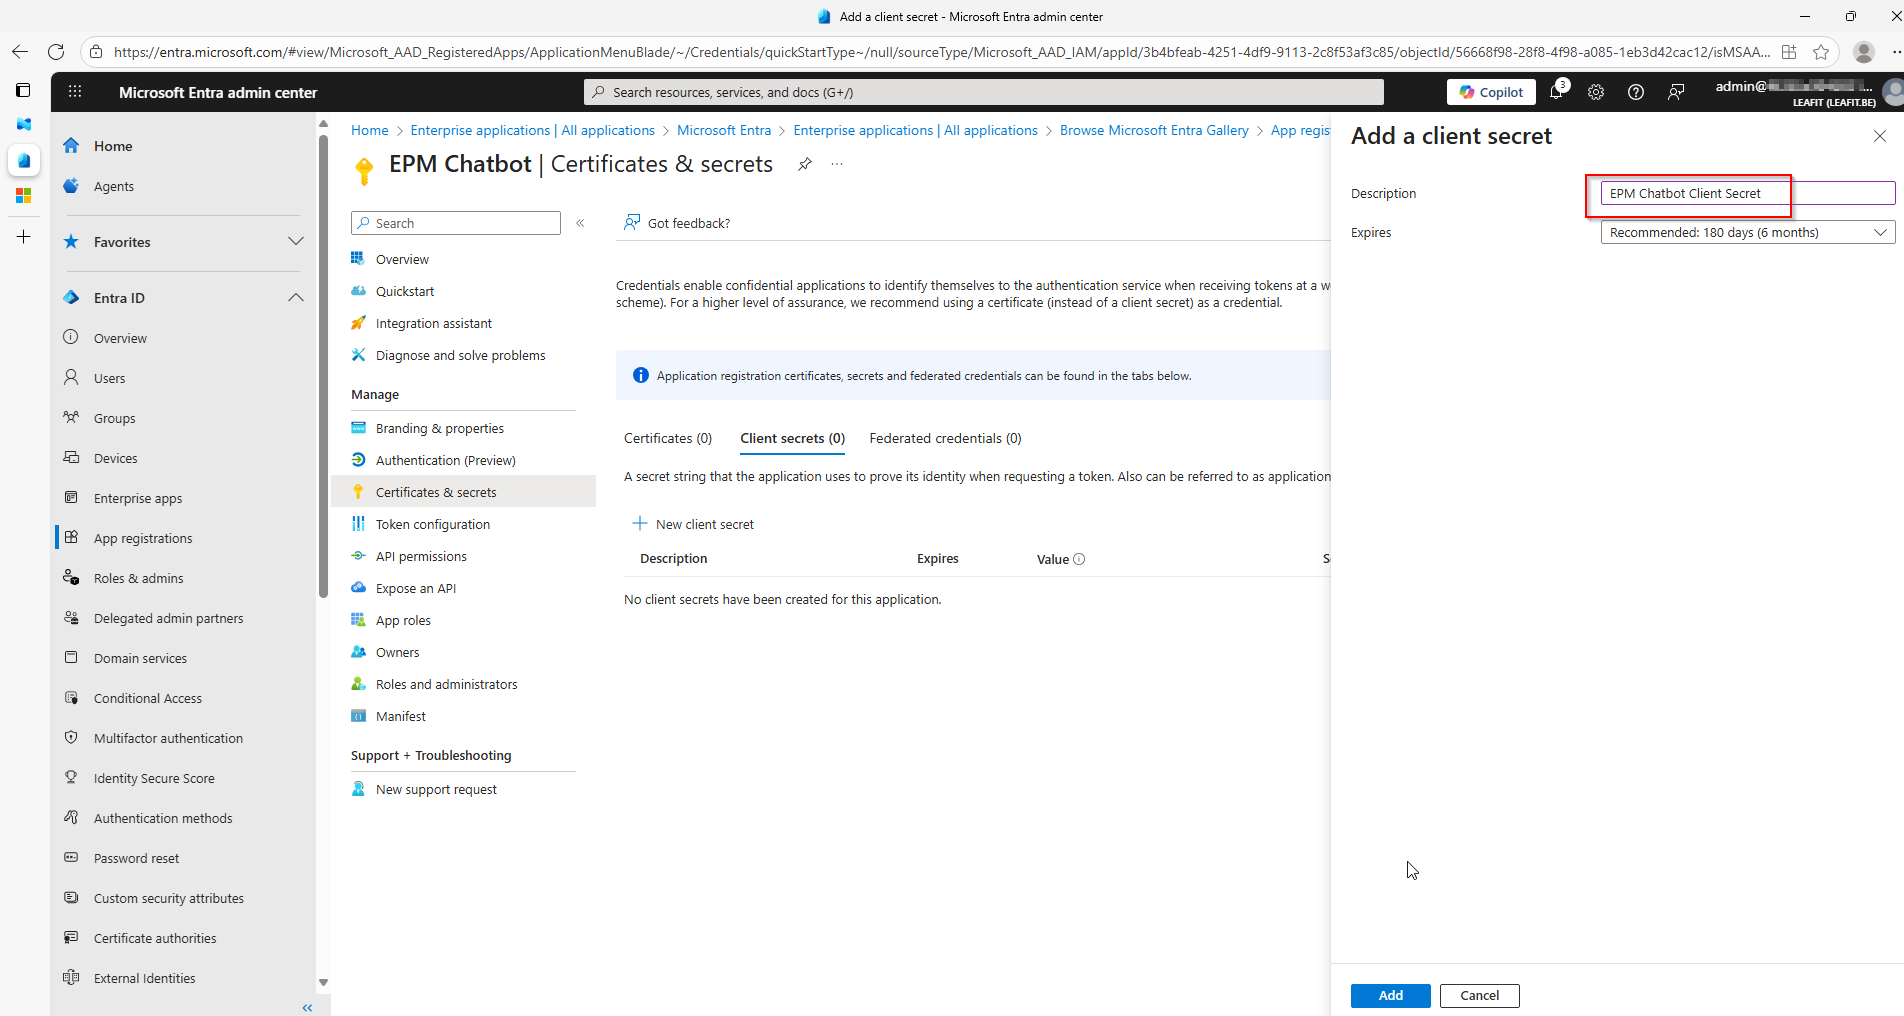
Make sure to take note of the value and secret, as these will be redacted after the creation.
On to the last step, where we will create an Azure Logic App!
Create Azure Logic App
Finally, we will create an Azure Logic App that will poll the GraphAPI at a recurring interval for new approval requests. This will use the App registration we created before to make sure it has the right permissions. After this we get all the data from the GraphAPI, we will parse it and than use the Teams connector to send a formatted message in a Channel of our choice.
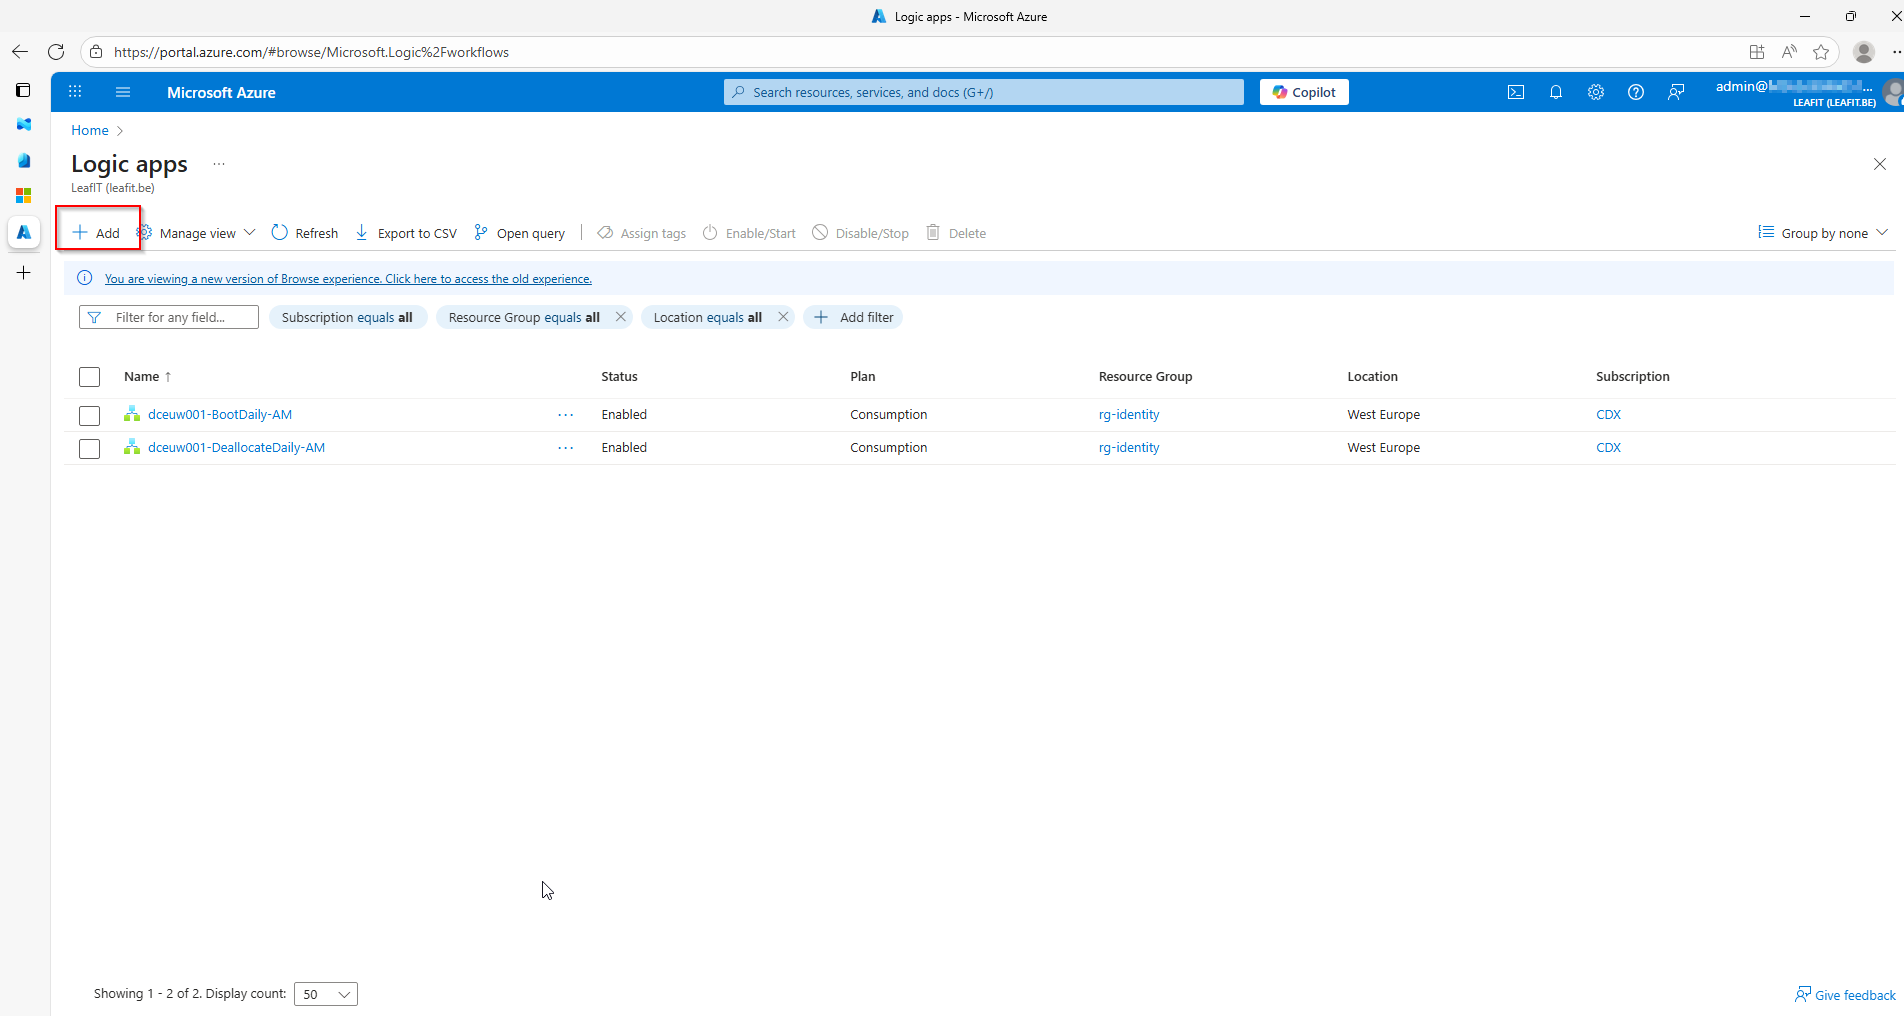
First things first, creating the Logic app. This is done through the Azure Portal.
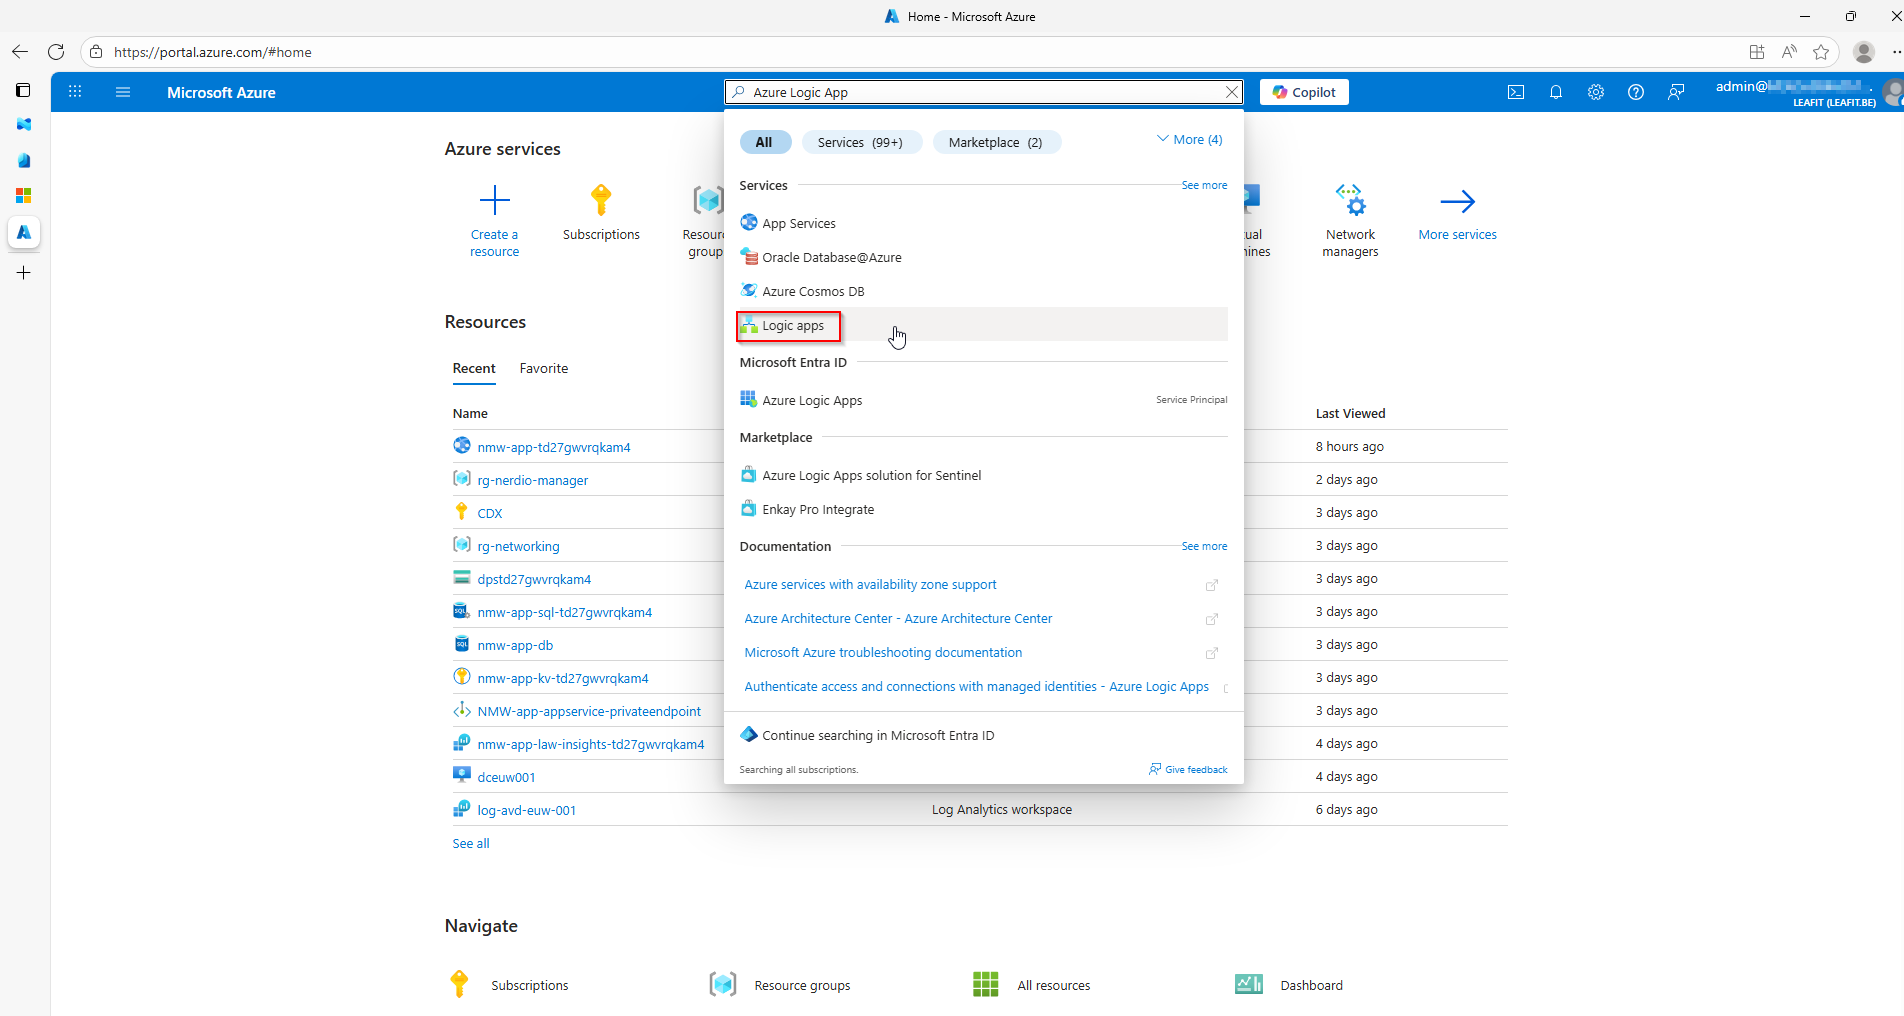
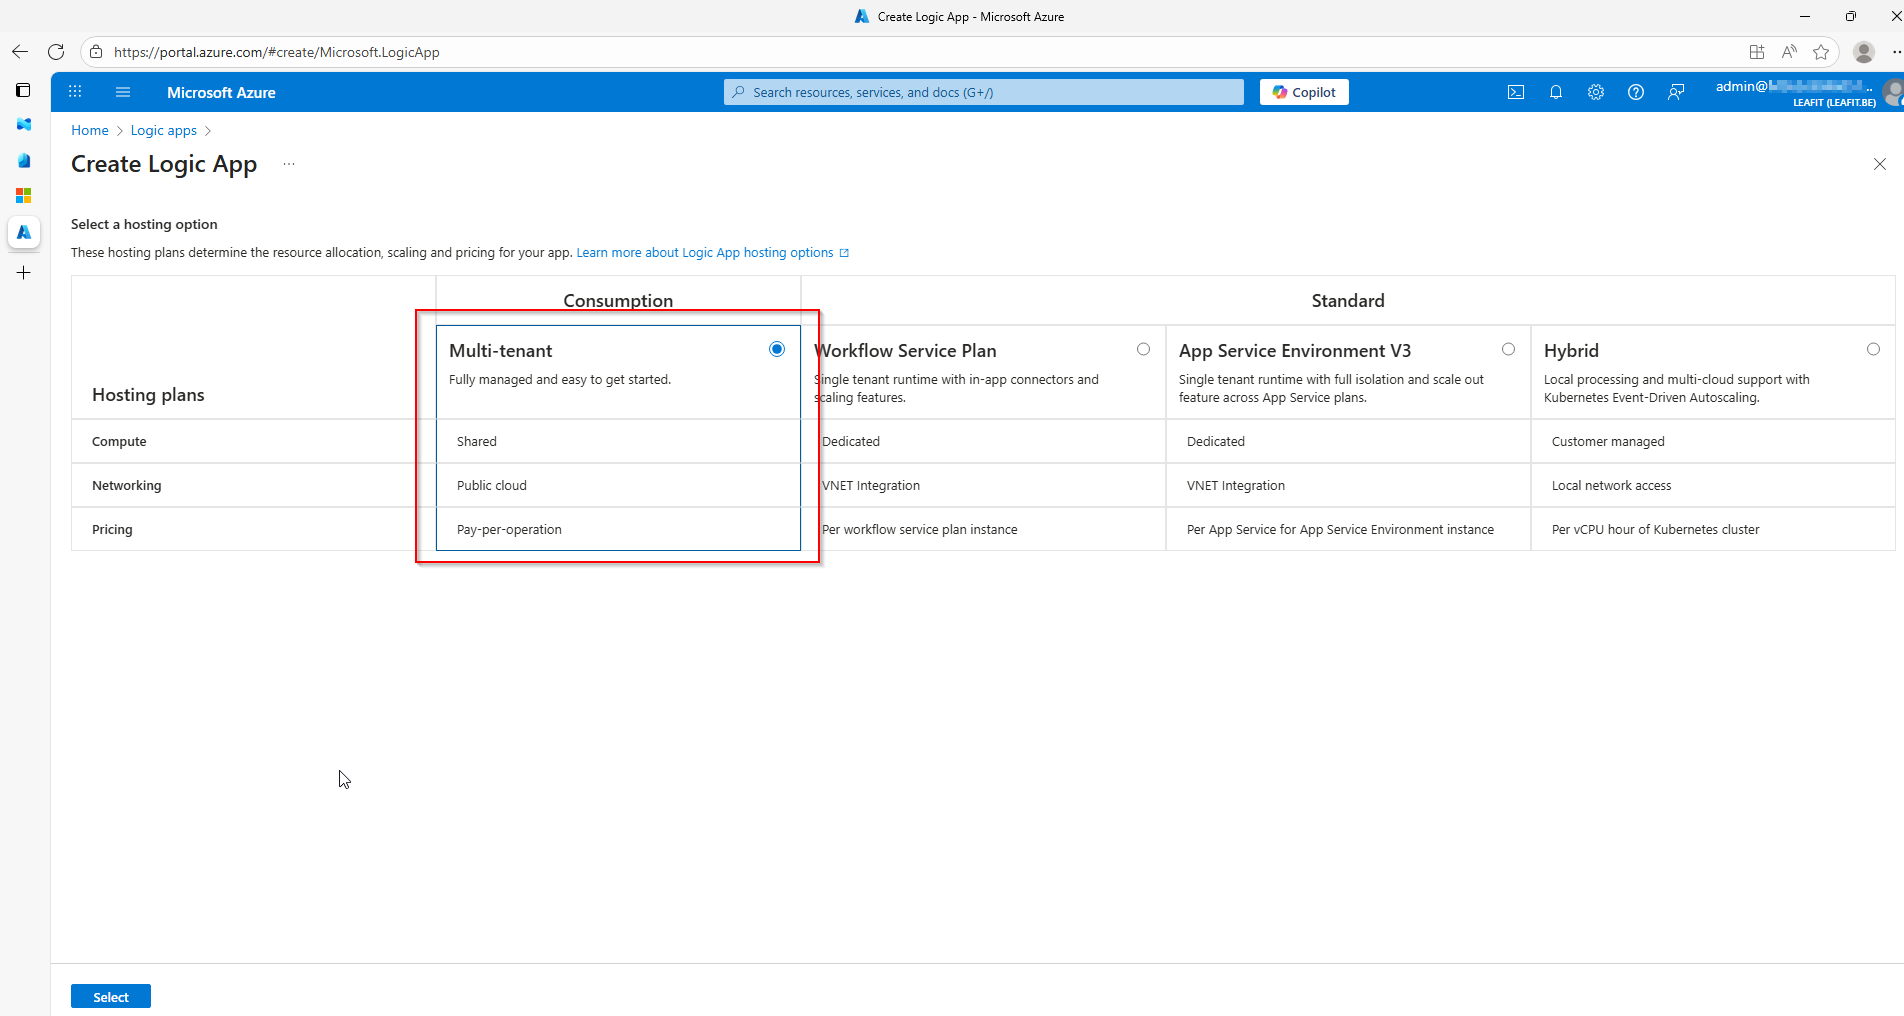
We will opt for a Consumption-based Logic App to create our MVP.
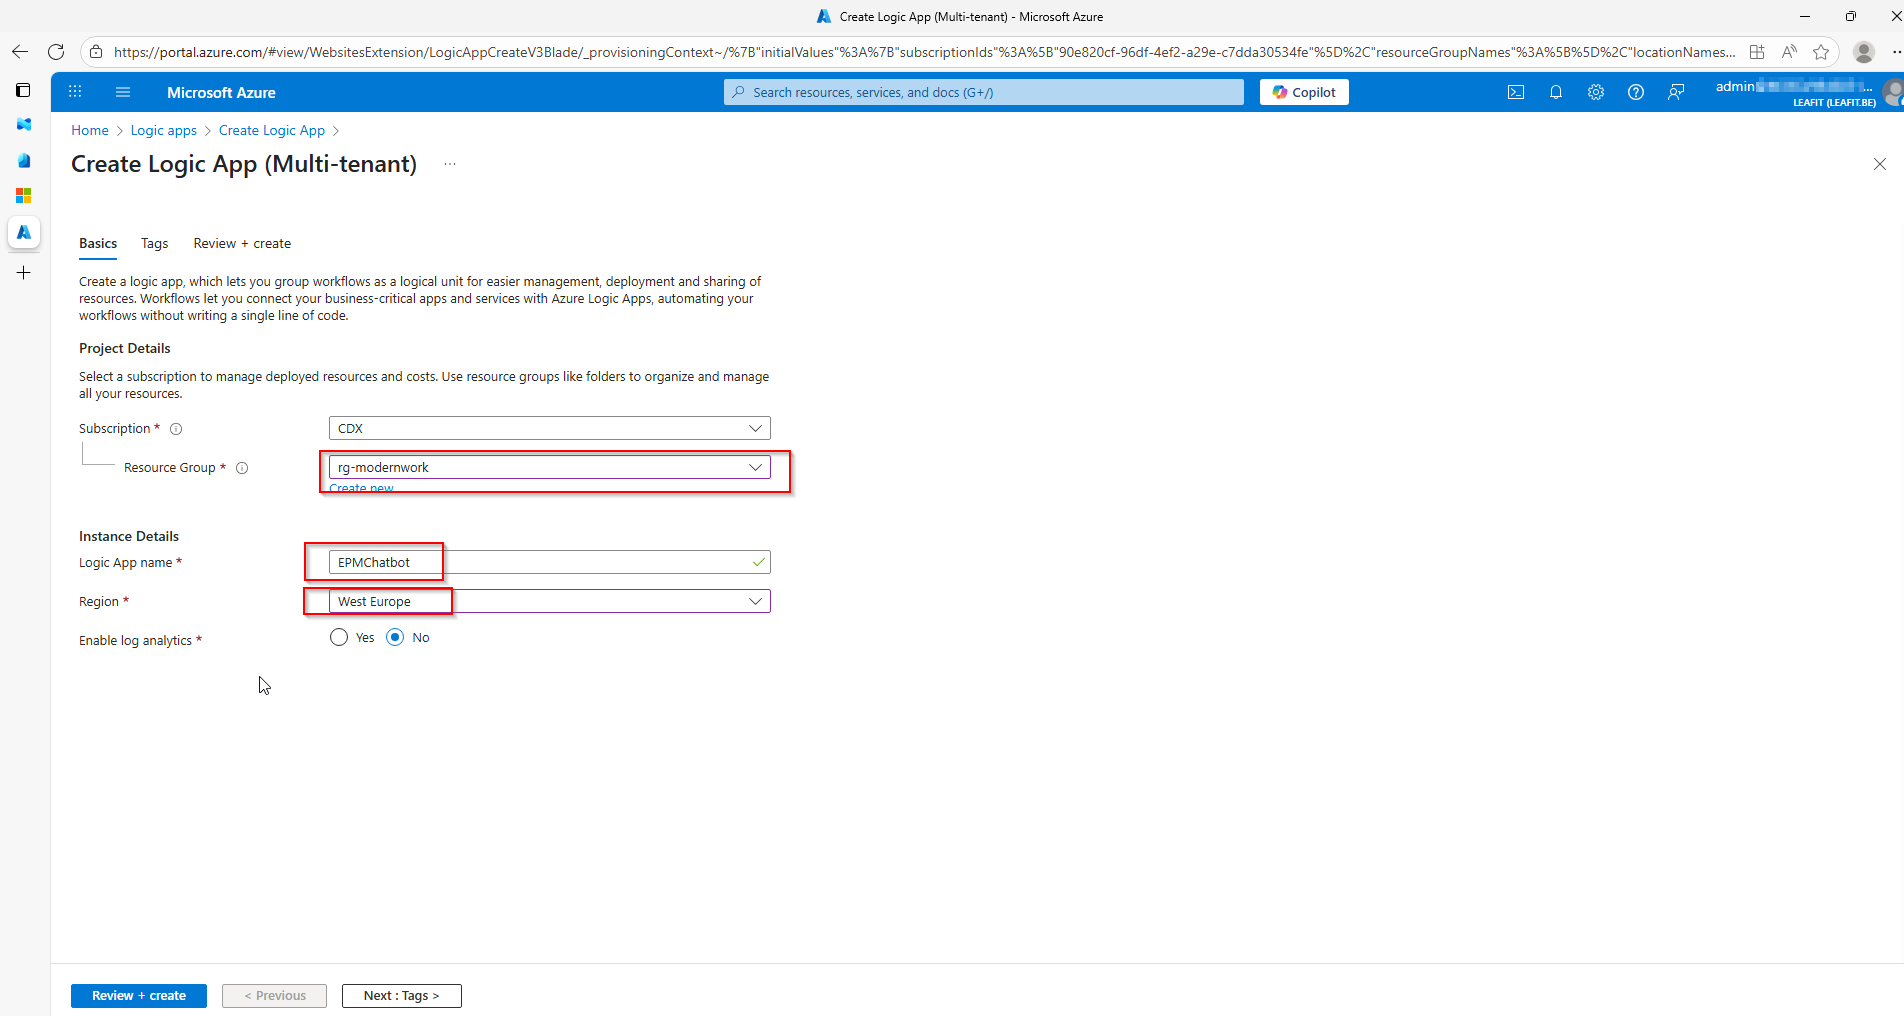
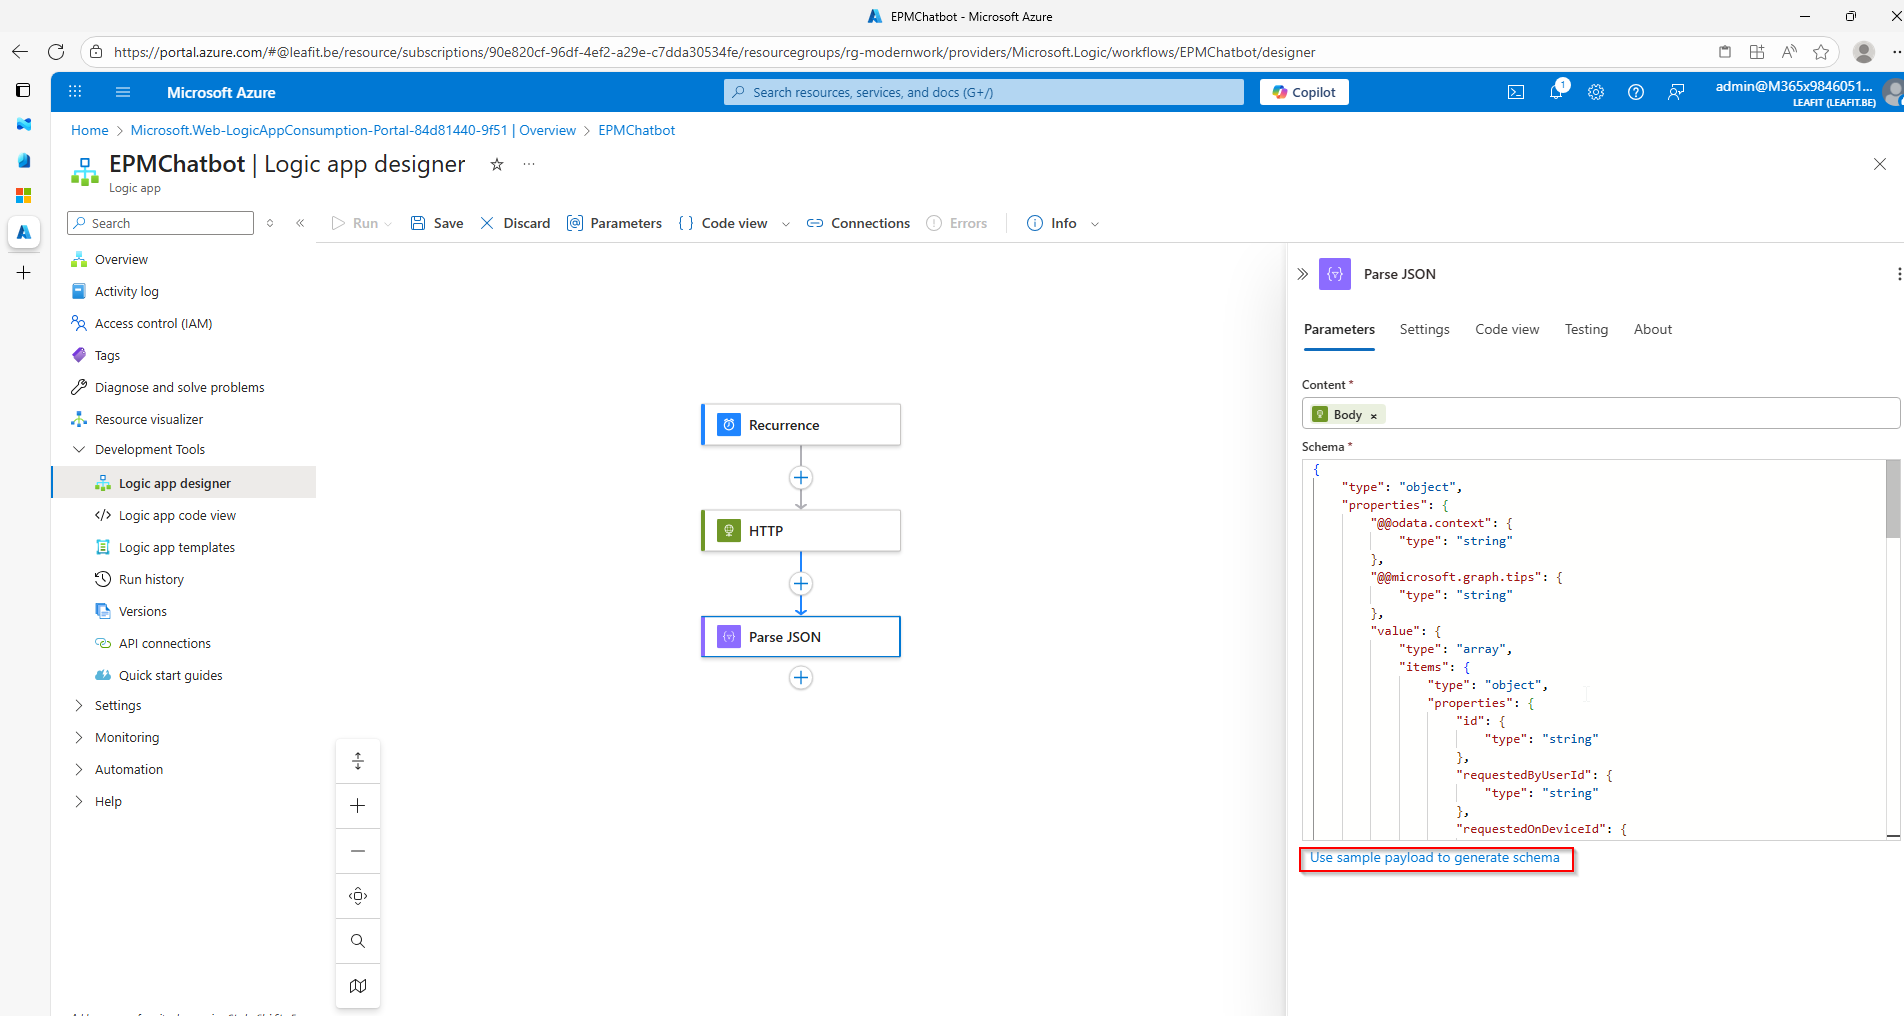
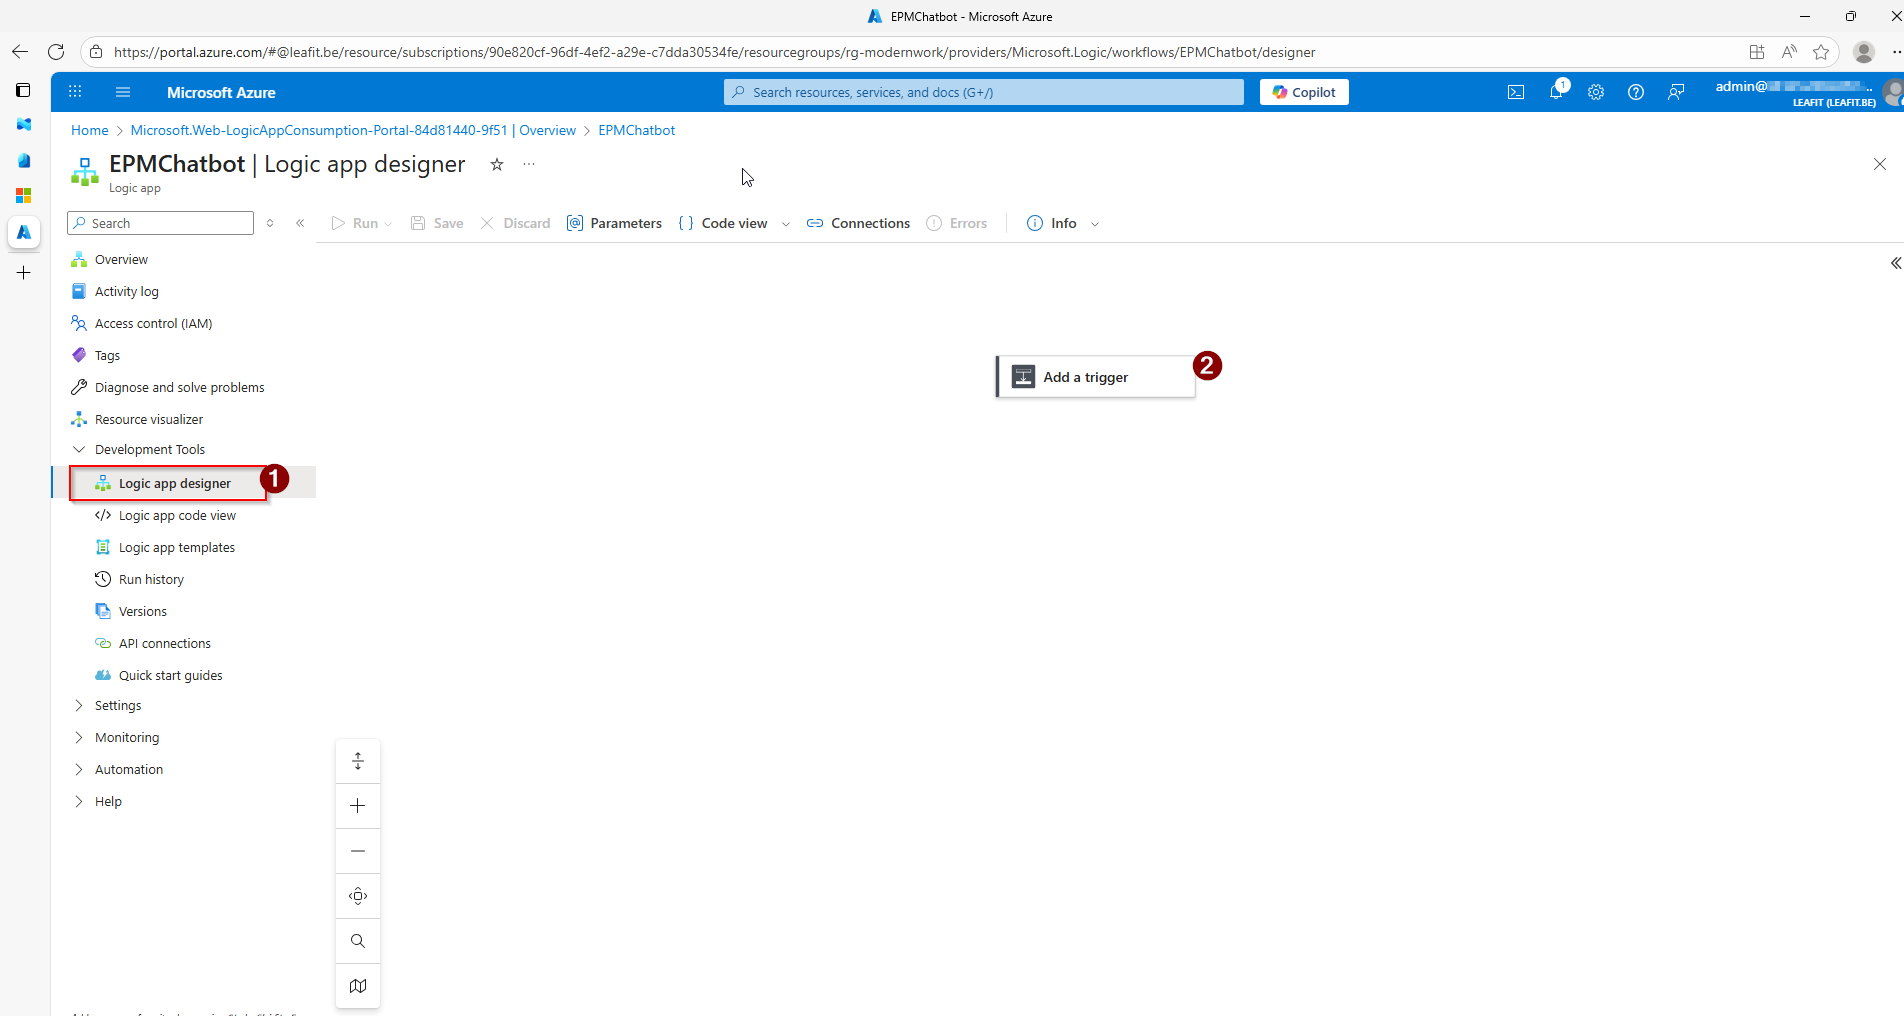
At last, we will use the Logic app designer. Here we will start by adding a trigger. Here we chose to go with a recurring moment. You can specify the time between this however you want.
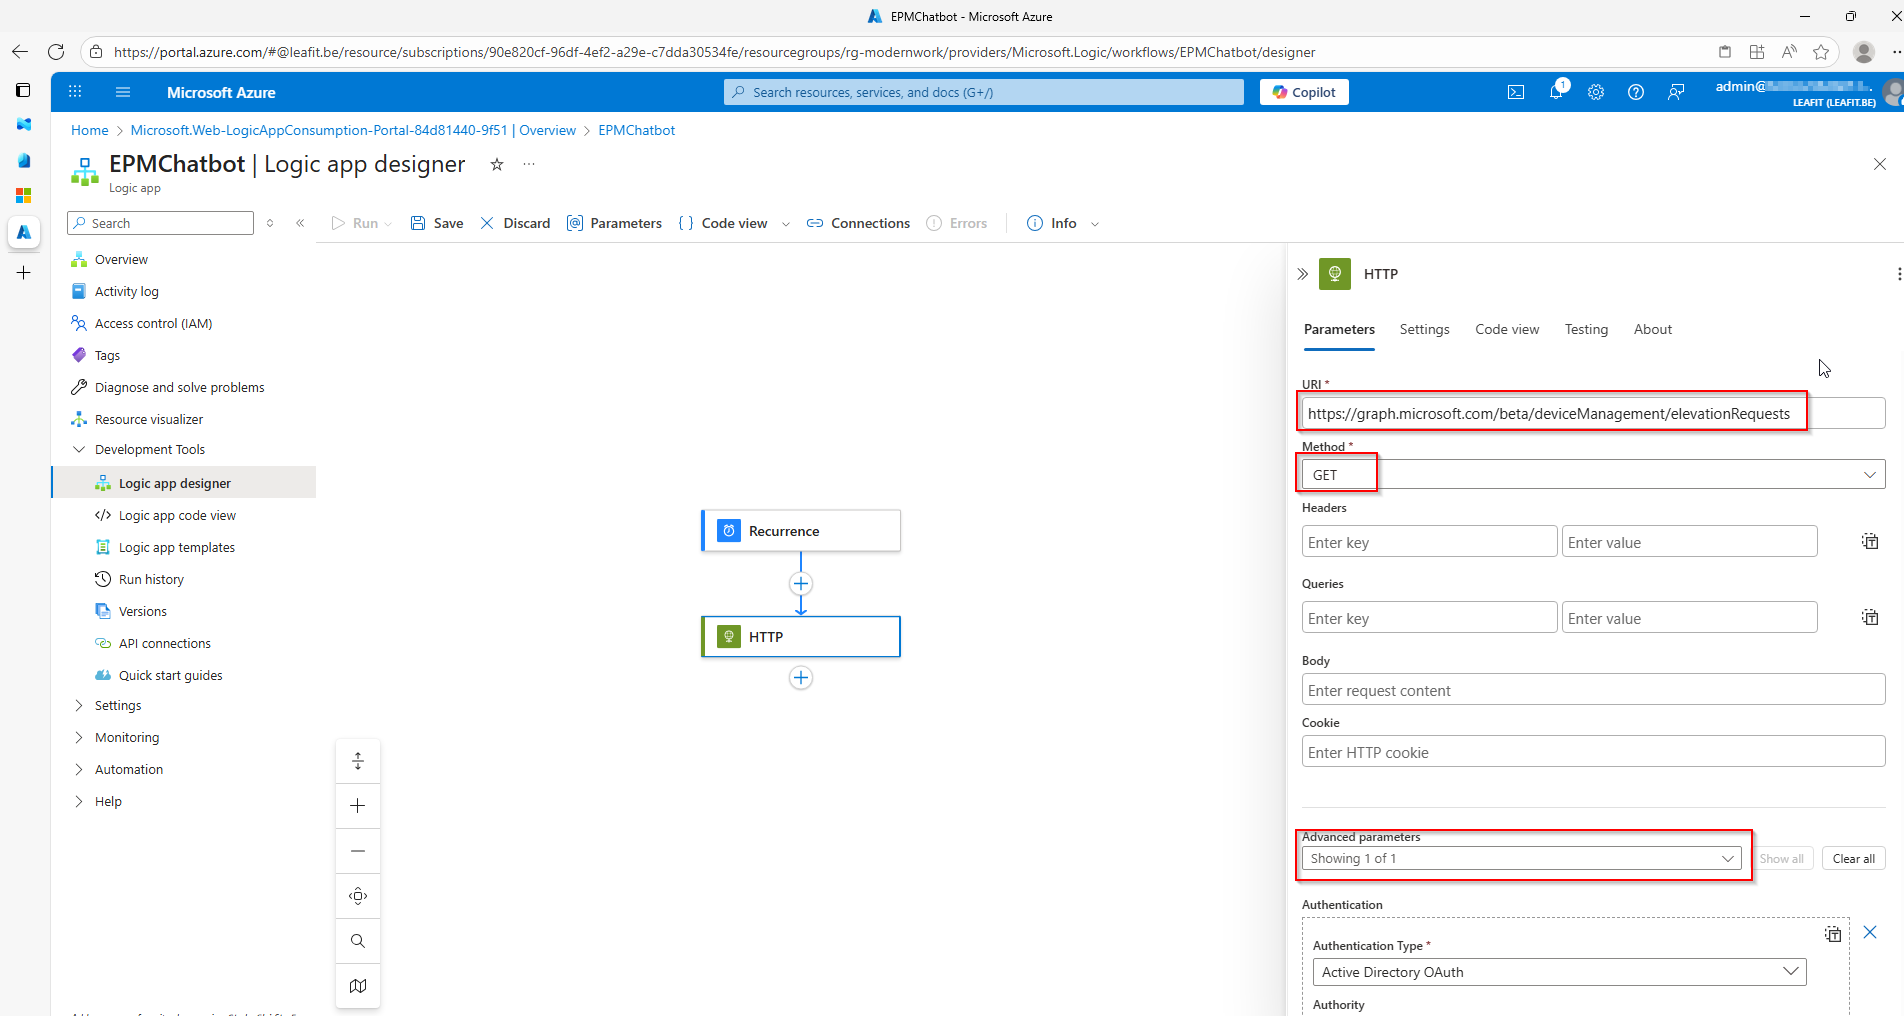
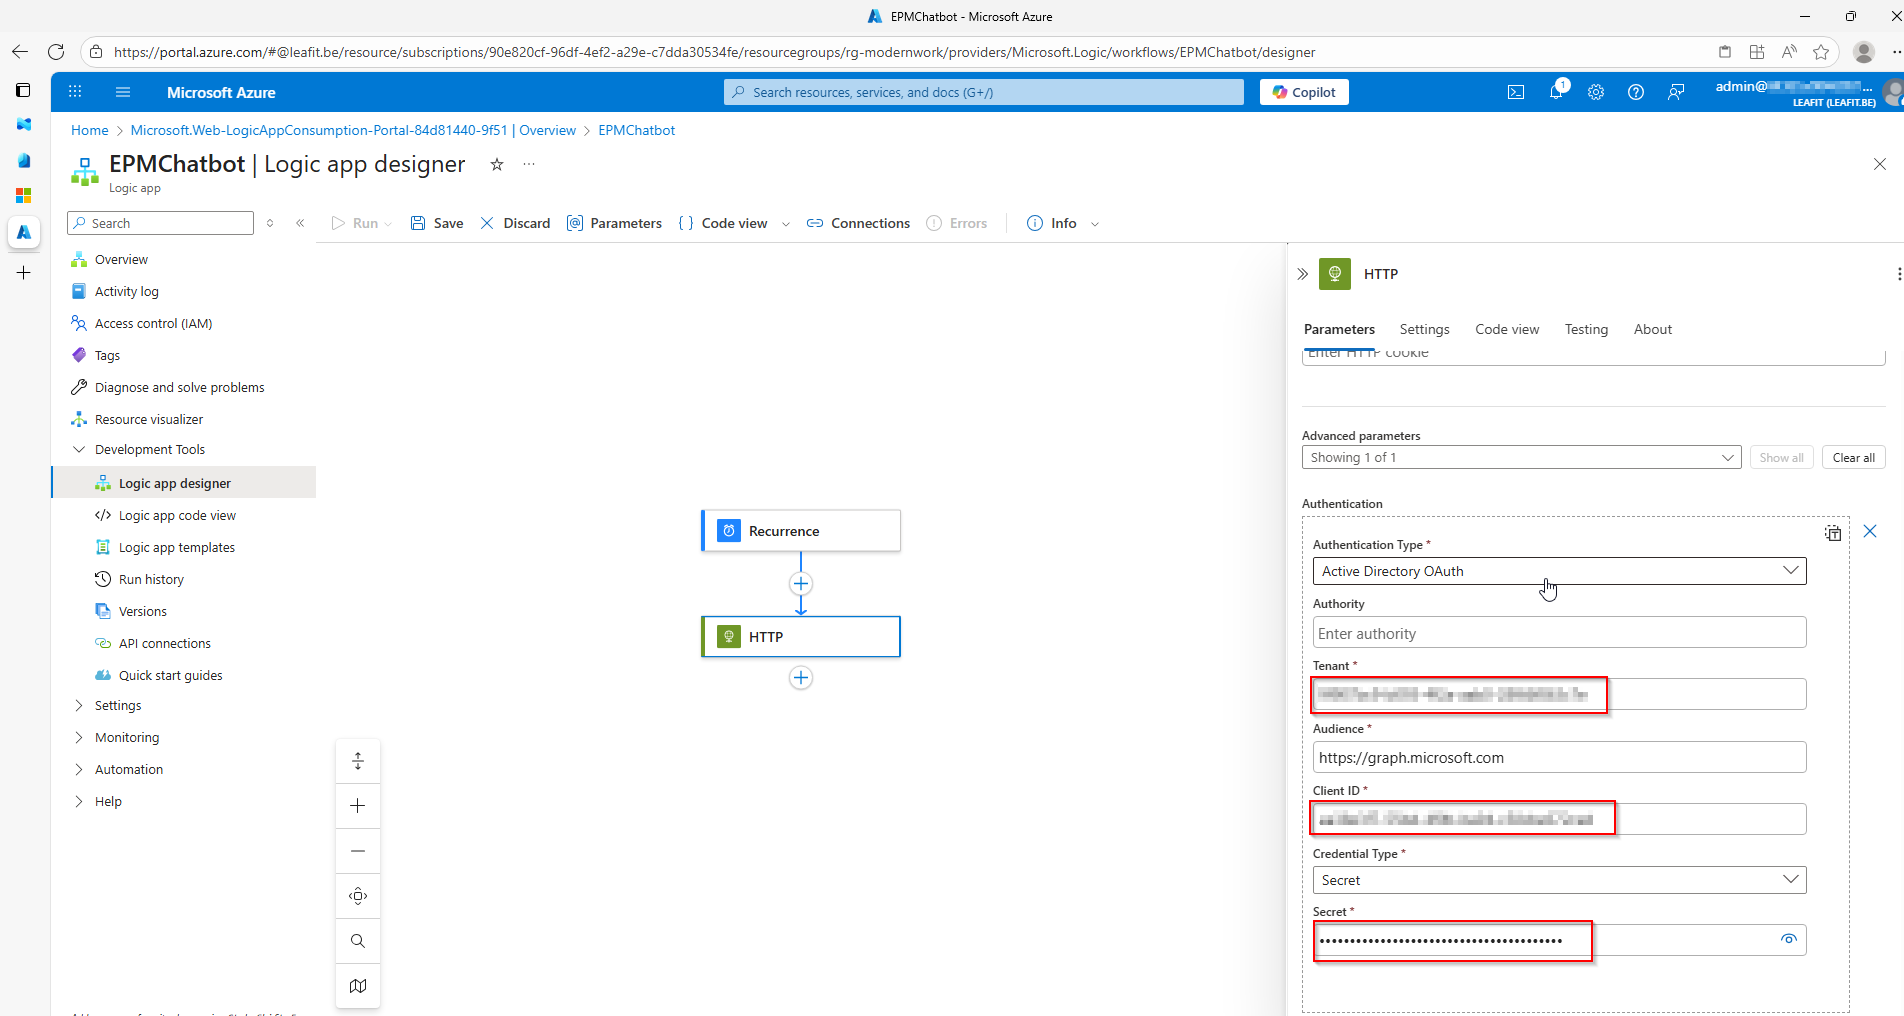
Afterwards, we will collect the data from the GraphAPI. Using the information we used in our test with the Graph Explorer. It is important here to also configure Authentication under the “Advanced parameters”. Otherwise, the Logic app will not have access to the right permissions.
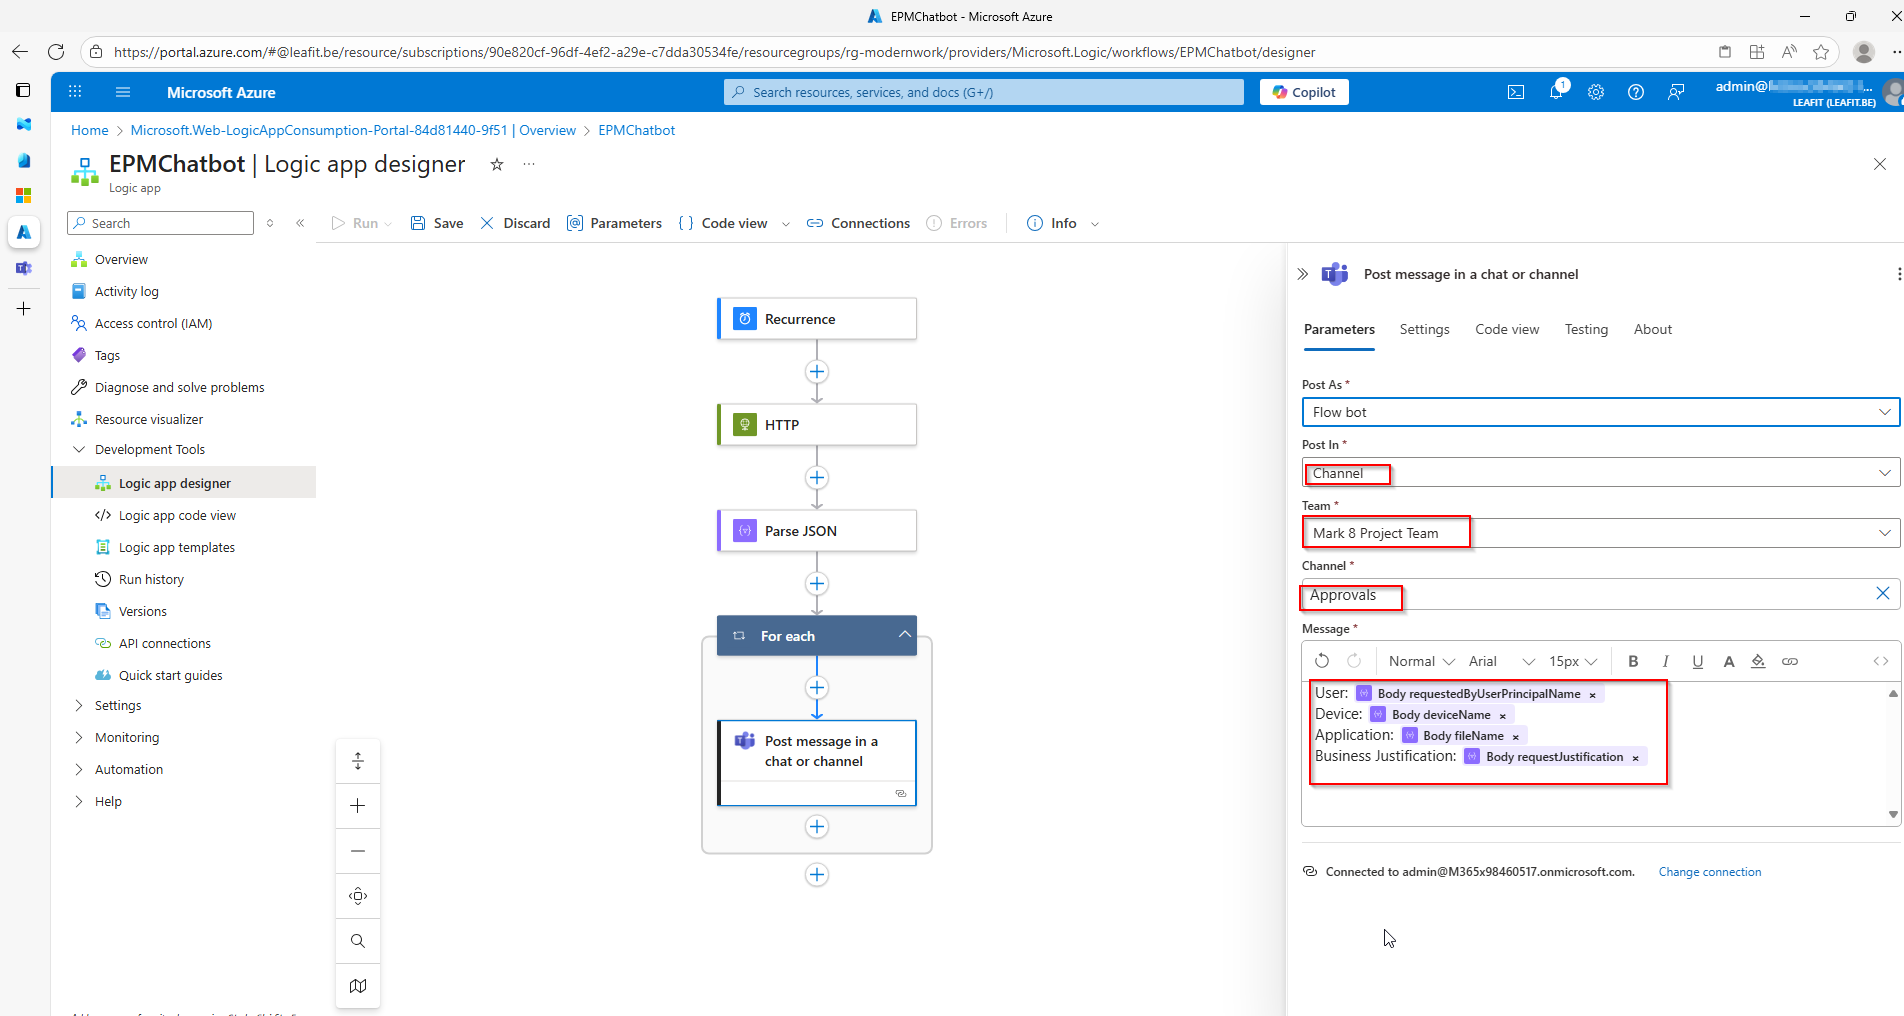
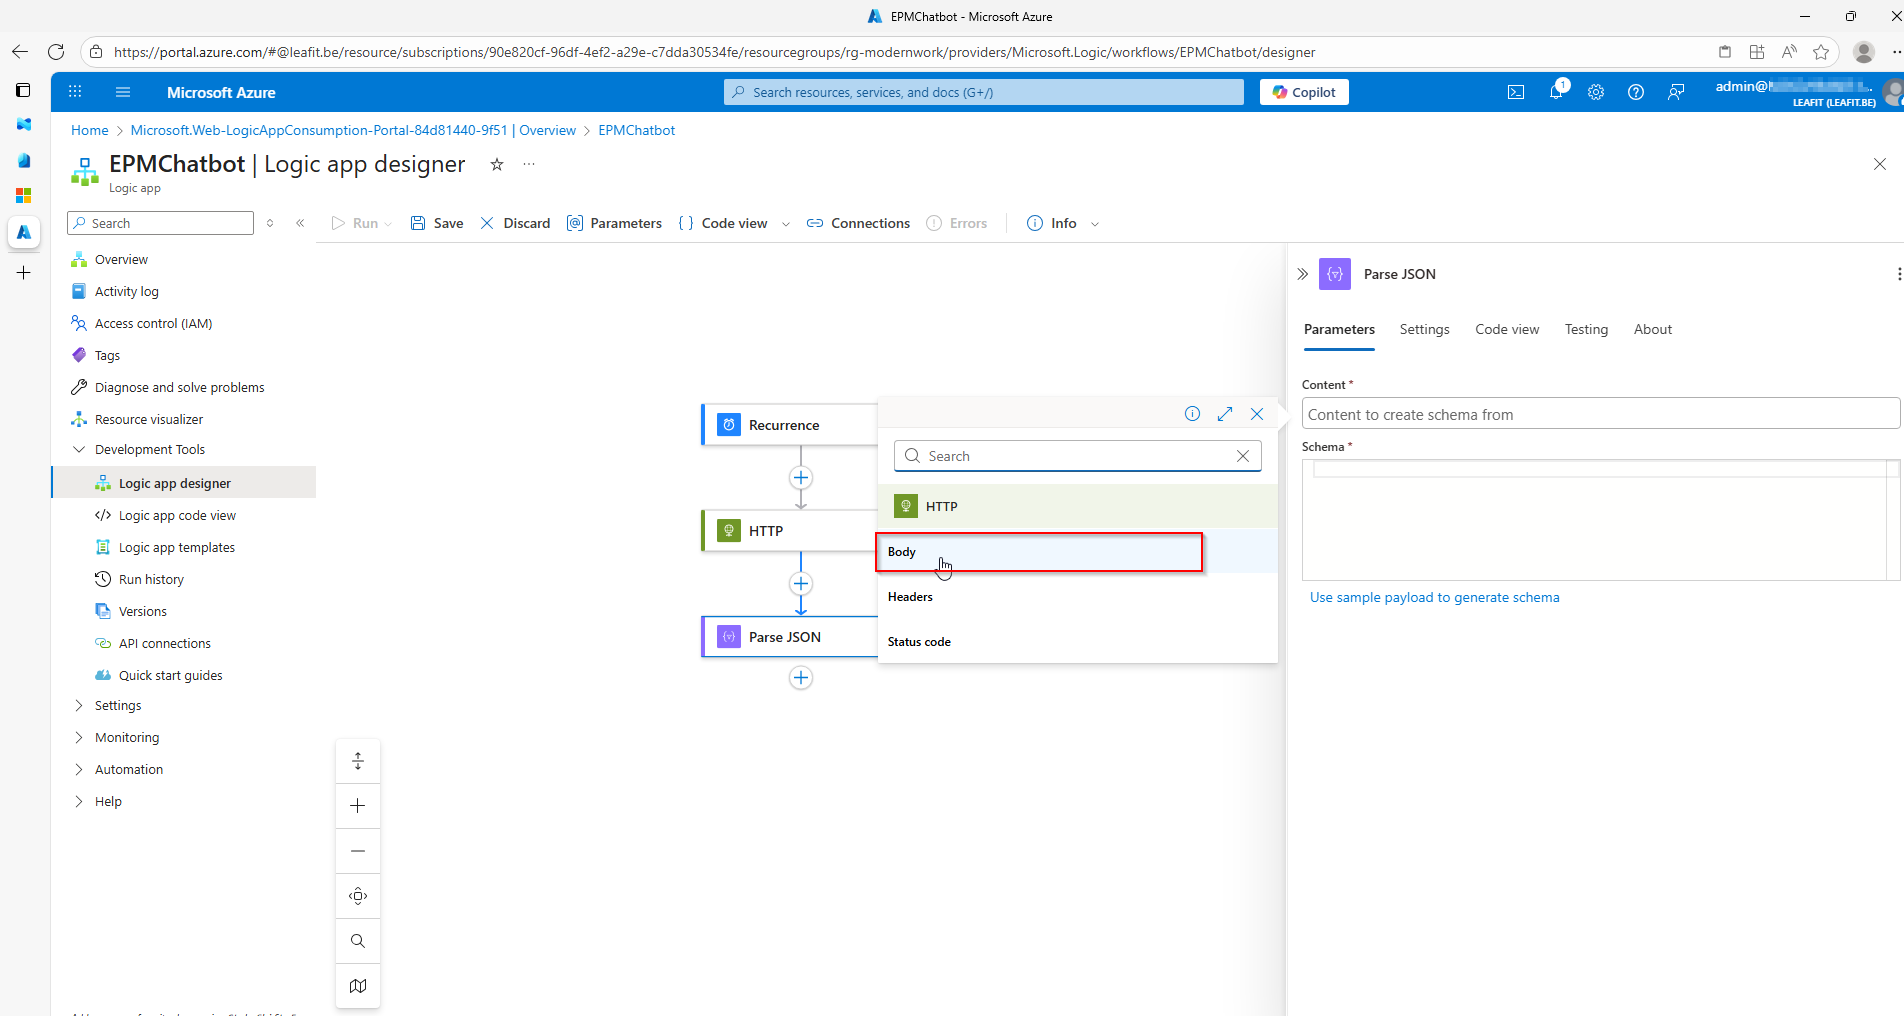
Afterwards, we will Parse the JSON that is in the Body of our HTTP request. Here you can use the “Use sample payload to generate schema” option. Creating the schema for the JSON can be tedious task. By using the example output from our Graph Explorer test, we can do this in a heartbeat. Finally, we will use the “Post message in a chat or channel”-option from the Teams connector. You can see there are quite a few options like the UserPrincipalName, file name and so on. We have just used a minimum in this demo to make sure everything works as it should.
The result!
After all of these steps, the following message should appear within your Teams channel of choice, with a link that can send you straight to Intune portal.

Conclusion
To conclude, you can see that it is perfectly possible to automate your EPM approvals with Teams. In this article we have built an MVP to look into the possibilities. However, there is much more to look into! In the next few months I’ll take a look at what options we have to further integrate this in Teams to completely remove Intune out of the equation. Let’s see how far we can go!
As always, any questions, remarks or improvements spotted in here, feel free to reach out to me!
Leave a Reply